
  |
|
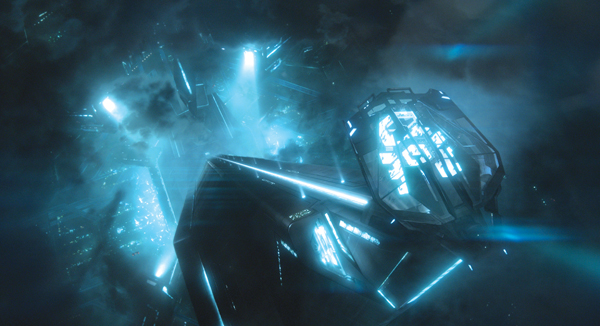
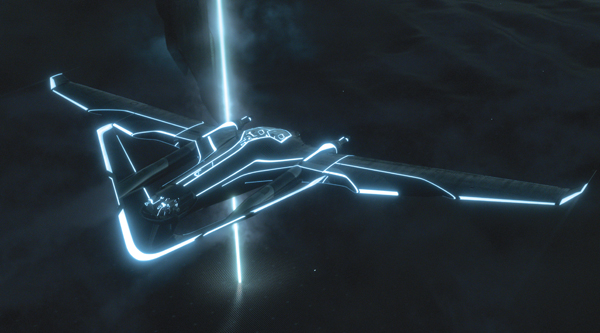
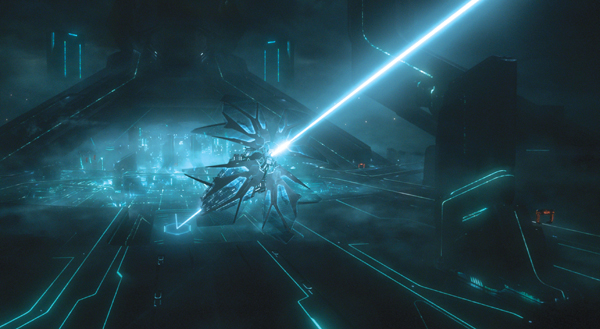
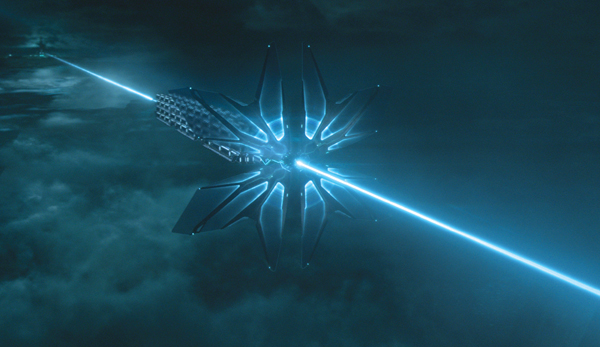
TRON Rules In some cases, the team had plenty of concept art. For others, there was next to none and they needed to flesh out their shots according to the established rules. Because Digital Domain had been directly with production from the start, Prime Focus' artists could focus immediately these tasks instead of first undertaking an extensive R&D and concept stage as they normally would. Solar Sailer They were given three pieces of concept art for the Solar Sailer, along with a rough model used for previs. What its design needed was what the production called richness – subtle detailing to not only communicate the practical, technical nature of all elements inside TRON but also its large scale, a quality the base asset lacked. “While there were several practical set pieces for the Solar Sailer, no single, master set piece was made,” said DFX supervisor Jon Cowley. “As result, portions of the set, for example sections of the cargo pods, were shot live action that we, in turn, had to match in CG on our platform-only set. Other parts of the vessel like the sails only existed as concept art and we had the flexibility and freedom to further develop the look, movement and energy pulses associated with them.” Modelling for the ship was done inside Maya and Mudbox, and at times with ZBrush. Speed and Distance The brief stipulated that the ship should move very fast, on an essentially straight line at a constant speed, and at an altitude of 10,000 feet. At this height, of course, objects on the ground scarcely appear to be moving, and they needed a means to create more interest and a sense of motion and speed. They added some flex to the sails, for example, but what was most effective were the quantity of atmospheric elements the artists layered into the surrounding space. In the end, a huge number of these atmospherics was required, and creating and managing them became a major part of their work. Adding atmospherics meant dealing directly with stereo requirements. The team couldn’t employ some of the 2D techniques typically used for atmospherics, such as putting footage of clouds or smoke on cards. “In a volume of this size, given the amount of depth we had to convey, everything had to be 3D CG and had to be rendered,” said Jon. “It’s amazing what can happen. When something like a cloud is completely out of focus off in the distance, if it isn’t sitting in the in the proper spot in stereo space, you’ll suddenly have a soft fuzzy cloud popping off screen or sitting too far into the background.” Cloud Team For the terrestrial landscape, they wrote they own procedural landscape generator that obeyed the TRON rules. For example, the rules about angles dictated that all objects would be constructed with 30°, 60° and 90° angles, like the construction of a computer chip. Their procedural toolset was built accordingly and used to construct most of the environment, into which they would drop ‘hero’ sculpted pieces wherever required. “This tool had to be made quite show-specific for TRON,” said VFX Supervisor Chris Harvey, “but no doubt we’ll recycle the code at some stage for use on another project.” Digital Domain supplied various shot references from other sections of the film plus the concept artwork for the environments. The shots supplied for reference were various hero shots that illustrated the style for the film and at times showed bits of landscape. Apart from that, the team had three rules to follow. First was the direction of travel, a straight line toward the portal, as dictated by the story. Second was the 30°-60°-90°-angle rule. Third was the layout of a V-shaped canyon, composed of 30° angles that the Solar Sailer entered on its way to the portal. Stereo Cameras Skies and Cityscapes Dealing with the fundamental changes required to produce matte paintings for stereo movies was a challenge. Jon explained that nothing can be cheated or approximated, all geometry had to exist and be created, modelled and assembled to occupy 3D space. They used the paintings for a lot of the very large assets because it was easier than trying to texture and render every detail. Freefall Jon said, “Stereo can throw a wrench into a shot that should otherwise be pretty straightforward. For example, in this case, the glass in the elevator needed reflections added to it in post, which normally isn’t so difficult. But these had to be proper reflections, receding in depth in stereo.” Single Light Kit However, getting it right in the first place took some effort – it wasn’t simply a matter of matching their lighting to an existing plate, but had to be consciously art-directed like the clouds. Chris said, “An analogy we used early in production to capture the look was that TRON should have some characteristics of a stylish car advertisement. Our goal became creating that feeling of light emanating from the beam of light they were traveling on, and the impression of light from the direction of the portal and city, paying particular attention to the artistic nature of the shot and yet trying to maintain and believable and consistent lighting direction.” One of the more difficult lighting developments was establishing the set-up for all clouds and environments. They wanted to ensure that they could tweak and control this lighting further along the pipeline in Nuke. Because it would be affecting so many shots, they especially didn’t want to commit themselves to an approach that couldn’t be adjusted in the composite to suit a special request from the director or VFX supervisor. They wanted to avoid going back to extensively relight shots. So they broke down their set-up into an RGB-type of pass. Jon explained, “The convenient aspect of this uniform lighting was that, across the wide expanse, we could limit the sources we had to deal with to the light they were travelling toward, the light they were coming from, and the generic fill lights used for our atmospherics and clouds, that were being created by the beam. That gave us three basic light sources, just right for an RGB system.” |
 |
|
|
|
Render Economy Checkerboard Render From that stage, they would work on the left eye and fully render it in CG, and then the right eye, also fully rendered in CG. Jon watched the render process carefully. “Within the 13 minutes of material, a particular render might not come off the farm for three or four days, Jon said. “It may look great but, for some reason, have required 20 hours per frame. The right eye now needs rendering, but that render time is not really acceptable within your workflow. So you have a dilemma – do you stop and figure out where the settings could be improved and render the left eye again or, because it looks good, just retain the settings and render the right eye the same way? You can’t change the settings for the right eye only. They must be identical.” Data management to keep track of the corresponding passes and layers for the left and right eye of each shot was another substantial undertaking. They wrote special tools to manage these details, freeing up the lighters and compositors so they could concentrate on getting the left eye to look as good as possible. Only a small dedicated team – consisting basically of Jon! - had to worry about the right eye. These tools, or interfaces, allowed him to control the process with out having to open Nuke or Maya or revisit the scenes to track what was generated or being used in the composites, and match the right eye to this. Another mandated software was Nuke. In this case, Prime Focus had not been using Nuke in their pipeline. They had been a Digital Fusion studio, and found they had to change their entire 3D pipeline for TRON, involving a considerable integration process and porting several tools over to work with it. However, Nuke already has many good stereo tools that made some of their in-house tools redundant, avoiding the porting problem. Because Digital Domain supplied the different Nuke-specific ‘show-look’ tools, like the glow lines tool mentioned above, as well as stereo tools, everyone was working on common ground. Prime Focus especially liked OCULA’s tools for dealing with stereo anomalies. “A high-contrast show like TRON could have become even more demanding for us, especially regarding light polarization and reflective surfaces that potentially create stereo issues,” said Jon. Life in Stereo On the other hand, this was Jon’s first stereo show. “On my first day on the project, I sat in the theatre with Chris looking at shots while he pointed out all the details we would need to address – but I couldn’t see any of them. It was a visual blur to me. So I’d say that the first hurdle on stereo projects is helping the team to become more ‘stereo savvy’ and able to identify issues within the images. You can’t do this alone or by reading books on the subject. You need a mentor to walk you through visually. “The difficulty of learning to work in stereo can be underestimated – it does change the work of a VFX artist. Stereo also needs an experienced DP on set to shoot the blue screen and other VFX shots for the team to work on. Some aspects of stereo footage can be corrected in post, but others cannot be.” |
   |
| ColourMatcher R&D A major stereo issue in the post production arose because one camera on a mirror rig shoots through a mirror and the other shoots a reflection from a mirror. “Reflected light is naturally polarized, so the effect creates differences between the left and right images,” Paul explained. “When you have a scene with light sheens and reflections, these will be noticeably less evident in one eye than the other and when viewed together in stereo, the result is disturbing and unnatural to the viewer. “Polarization issues emerged in every shot containing on-set reflections. Unfortunately, not only is the world of TRON a very shiny place, but it also features characters wearing shiny black suits. The ColourMatcher plug-in for Nuke from The Foundry’s OCULA package enabled us to take the colour information from one eye, analyse the same information in the other eye and correct the pair by making the colours consistent across both images. “We worked with The Foundry over a few months to help refine ColourMatcher, and it worked out well for TRON. It’s not a ‘plug-and-play’ kind of tool but we were able to successfully hand the set-up that we had developed from the original software to the outsourced teams on the project. When they ran it, it would produce four different outputs, each tuned for different tasks – one for details, one for adjusting focus, one for large gradients and so on, so there wasn’t a single fix that addressed everything. They would generate these outputs and make a collage of the best parts of each, creating the other eye and overcoming the polarisation issues. Once it was running it was fairly straightforward.” For v2.1 of OCULA , The Foundry incorporated their set-up and consequently the plug-in now consists of only a few nodes instead of hundreds, making it quicker and easier to get a correction. Paul still feels it’s necessary for users to go through the process of generating the various outputs and collaging them together themselves, instead of going for a one-click procedure. |
  |
| Words: Adriene Hurst Images: Courtesy of Walt Disney Pictures |
| MORE FEATURE ARTICLES |
| Featured in Digital Media World. Subscribe to the print edition of the magazine and receive the full story with all the images delivered to you.Only$79 per year. PDF version only $29 per yearsubscribe |


In Depth


