

A global team built assets for a film produced in Unreal Engine entirely without compositing. Its world and characters are now ready to re-purpose for games, VR and the metaverse.

BLUE is a real-time animated short film created entirely in the cloud by a team of artists collaborating from around the world, rendered using Unreal Engine. BLUE is directed by Robert Petrie and executive produced by Angus Kneale, both from Preymaker VFX, animation and design studio in New York. The short film was partly funded with the support of an Epic MegaGrant.
BLUE was created over a total of 8 months by a team of around 20 animators, modellers, FX and Unreal Engine artists. Of the five Unreal artists, three of them lit and laid out nearly 200 shots. What made this possible was the team’s decision, made at the very start of the project, to complete the film without compositing. That decision proved crucial to the final look of BLUE. By removing the compositing step, Preymaker was able to dedicate more time to crafting the elements and, once production started, the look of the entire film in-engine.
This way of working allowed them to make fundamental creative decisions as a team all the way to final delivery in a way that would have been impossible to achieve using a conventional linear process.
Another motivation for creating BLUE ties into its open-ended story and the opportunity that Unreal Engine gave Preymaker to apply its world and characters beyond the short film. By using all of the BLUE assets in Unreal Engine, BLUE can become a Metaverse experience, a game, an immersive VR world and a live animation series. BLUE can be all those things, and for the director Robert Petrie and the team, that is the most exciting aspect of all.
Digital Media World talked to Robert about creating and producing BLUE.
Virtual Art Direction
“We had started playing around with Unreal Engine a couple of years ago, when it became clear that you could achieve complete, finished images all in-engine, without exporting render passes and then putting them back together in Nuke. We went into it with one phrase in mind -- ‘We want it all to be shot in camera.’ Unreal Engine gave us the ability to do that, to art direct everything within a virtual world – it was a dream come true.”
To achieve this, he described the project structure as very different to how any other software works and operates in a traditional 3D animation pipeline. “In Unreal, we had 6 project levels and under those live all the shots that go along with that level’s sequence. Once you open up that level you have, for instance, 40 thumbnails, which are your shots,” he said.
“We wrote custom tools allowing us to build a complete edit within Unreal in which all the shots were generated with the correct frame length, camera and character animation applied to the skeletal rig. You would then simply double click that shot number or thumbnail and everything would jump into place in the viewport. I would have days where I would literally jump around and tweak 25 shots, which was tremendous.
Story is Everything
“The biggest change in thinking that Unreal Engine demands is that you are not using Save As in the traditional sense. You don’t have a shot, then create and save 25 versions of it to get to the one you like. You are very much building a video game in the truest sense – you update assets, tweak lighting and build the world until you are happy and ready to deploy it.”
Despite the deliberately open-ended nature of the production side of this project, the storytelling aspects of Preymaker’s process is familiar. Story is everything, and should always come before tech. Robert said, “We never set out to make a tech demo but wanted to make content in a new medium and develop a way of working that results in assets that can be used across so many more mediums and possibilities. We went through all the same pre-production processes required for any short film – wrote out the story, followed by storyboards and then cut an animatic.
“Then we previs’d the entire short, edited it in Premiere and received an EDL from the editor that we then used to build all our shots. Concept art was created for the characters as well as designs for the sets. I love the process of making animation and the phrase ‘if it ain't broke don’t fix it’ is so true. You need all of these elements and processes to make anything, whether it's in real time or animation drawn by hand.”
Asset Creation and Rendering
Maya and Substance were used to create all the assets, which were then prepped to function essentially as game assets that could be imported into Unreal Engine and run at around 30fps. Robert stressed that asset generation is one of the most important steps when using Unreal Engine. Each asset, from a lamp to a laptop, has to be created in a way that will run in real time, and is critical to making sure you have the real world interactivity you need to be able to work quickly and efficiently.
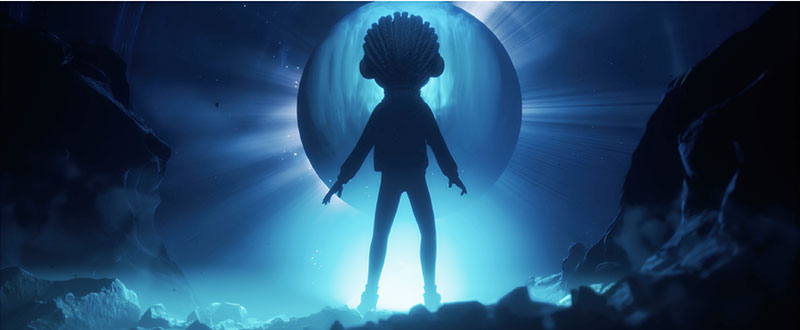
Megascans also proved to be a critical tool for the scenes such as the Alien Trench and forest. They spent a day going through and selecting rocks, and then exported them directly into Unreal. They could then be moved in real time to build out the environment to produce a composition in the digital world.
“A major goal for us was the ability to export the frames as each scene was finished within the real-time Unreal environment. For a fully lit scene with all camera FX such as depth of field, motion blur and atmosphere, it was taking about 5 to 8 minutes to render an 8 second shot at 24fps and 2.5K resolution.
“It made such a contrast with traditional renderers where I could wait 20 times as long to get render passes that I would still have to put together in Nuke. I really wanted to get away from that workflow – this new process made it possible for three of us to light and export close to 200 shots to completion. It still blows my mind.”
Lights, Camera, Action
By letting go of the compositing step, which is integral to traditional animation, Robert could think about BLUE like a filmmaker. “The big difference is that there are no layers,” he said. “It's like being on a stage in real life with real lighting, actors, sets and atmosphere being pumped onto the stage. The camera rig in Unreal Engine is a Cinemascope format for which we created a series of Panavision prime lenses that would feel like all films from the classic age of cinema. We set out to build a world where everything you see is through the lens of the camera.
“To set focus in real time, as well as in the aperture of the camera, was an incredible experience. We wanted this to be as close to the real world as possible – to simply make a beautiful looking scene and hit record on the camera when we were happy with how everything was looking. Unreal Engine was a tool that allowed us to not pull something apart for it to be put back together again in comp.”
It’s no wonder Robert finds the process exciting. Everything – shaders, ray tracing, interactive lighting, volumetric fog and depth of field – in effect stays ‘live’ until the end, including the cameras themselves. Not a single element lives outside.
Real-time, Real-world Lighting
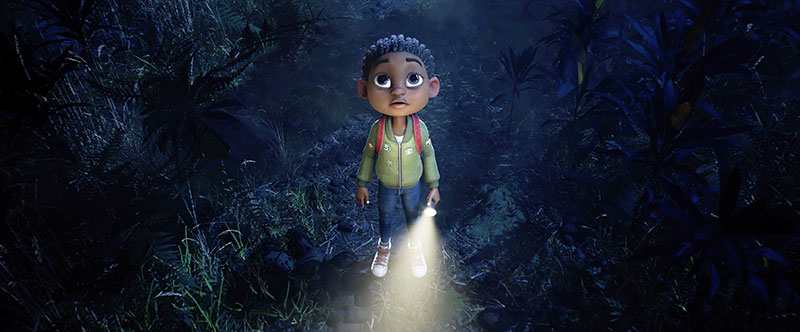
Lighting is one of the most interesting aspects of the project – it highlights the character, both follows and anticipates everything she does, as well as shows us where to look. Generated and controlled in Unreal Engine, the lighting is as close to the real world as they could achieve in terms of cinematography.
They wanted to go through the exact steps and process that a cinematographer would follow to light a film set. After each scene was art directed and set dressed as the scene required and looked just right, they chose the lights they would need for the sequences and shots.
“Like a film set crew, we would fill an imaginary lighting truck with all the required lights as well as bounce cards and black scrims to block light. For the Alien trench scene we worked out that a total of 10 lights were needed that could be used across 45 shots. It was amazing to translate all that I had learned from being around great cinematographers on sets and observing how they would light a scene. That real world experience was directly transferable to the digital real-time environment.
“We had conversations about each scene and composition, which goes hand in hand with lighting, and concluded that the subject, or character, should be the main focus, not the world around them. Your eye should always be on the subject even if the scene is almost pitch black. A strong silhouette is essential. We put a constant shader on Jules, our main character, to make sure her silhouette felt good in the frame before bringing any lights into the scene. Once we were happy with the composition, we would then bring in one light at a time to craft the light in the way the shot needed.”
Revelation
However, discovering that they could literally move any light in real time, with no lag or waiting, came as a revelation. It was literally like moving a light or turning it on or off in the real world. “I really think that having that level of interactivity resulted in a better look overall. You could try things out in 15 minutes to get a feel for a shot, and then head in a direction that felt good. Within an hour you had something that would work. It was an eye opening moment. Every day literally felt like walking onto a real set on a soundstage.
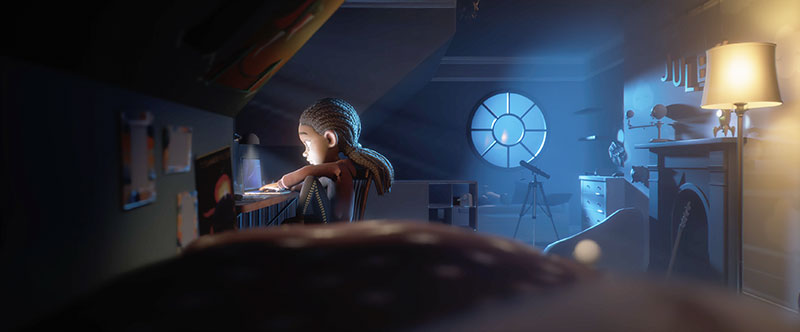
“Each set was actually incredibly small. Therefore, another key element of BLUE is the atmosphere, because it helped us give Jules’ world scope and volume. We pumped fog and volumetric lighting into the scenes in real time to create as much atmosphere as needed. It always seems incredible to me that you really only need a very small set to make the viewer feel that a huge world lies beyond. I wanted to adopt that classic cinema approach, from films such as the Wizard of Oz, of making a world seem limitless even when the production was only on a soundstage in Culver City.”
Review, Management and Documentation
With such fundamental changes to the regular pipeline to focus on, management and review were extremely important to keep BLUE documented, reviewed and under control. Screening Room within ShotGrid was another significant change for the team, making the process far easier just by having the artists see their shots in context daily within the edit. They could go back and see every published version, or just select a few shots at a time, or watch the whole sequence play out – resulting in a top level overview of the entire project.
It made reviewing animation and lighting much more satisfying as everyone could see it all in context, which was especially vital when everyone was remote across so many time zones. ShotGrid and Screening Room made managing the project more efficient and easier than other systems they had used before.
Beyond the Short Film
With the short film behind them, the team is now turning its attention to re-purposing the assets for other mediums. They are creating all the animation clips they need to build a library of motion. These can then be used within Unreal to make Jules an interactive character that a user can control and play. They also plan to explore procedural level building within Houdini and Blender.
The assets made specifically for the BLUE trailer were created at as high a fidelity as possible, while still able to run between 24 to 30 fps. “We have since made versions of Jules with lower levels of detail, retopologized within Maya and able to run at 120 fps for a VR experience and also at 60 fps for any game or Metaverse experience,” said Robert. “The biggest challenge was creating a new mesh for Jules’ hair that would be able to run at a much higher frame rate, substantially reducing the number of polygons and creating more detailed normal maps to make her game-ready.
“The next stage is R&D on Jules’ rig, making her fully interactive and allowing a user to control her via a gamepad or keyboard. We really want to give her movement a hand-animated quality for users taking her role, not a motion-captured feeling. This is important to really bring out the character in her and make her feel unique and fun to play and interact with. Building a library of game motion is going to be crucial to really bring out who this character is – which is beyond exciting.” preymaker.com


