

MPC delivered 675 VFX shots for ‘Nope’, working with the filmmakers on alien creature design, art directing CG cloudscapes and a new approach to converting daylight plates into night shots.
Director Jordan Peele’s film ‘Nope’ is nominally about a brother OJ and his sister Emerald, who run their family’s horse wrangling ranch out in the American West. But the movie soon veers into science fiction, suspense and ultimately horror when OJ and Em discover an enormous alien is devouring their horses.
MPC worked right across the production of ‘Nope’, first working directly with the filmmakers during pre-production on concept art and visualisation. By the end of the project, the team had delivered more than 675 VFX shots requiring alien creature design, CG cloudscapes and a new approach to converting plates shot under daylight into night shots that the team developed with the film’s cinematographer Hoyte van Hoytema.
MPC's Production VFX Supervisor Guillaume Rocheron led the visual effects team, alongside Art Director Leandre Lagrange and Head of Visualisation Patrick Smith leading the visualisation work.
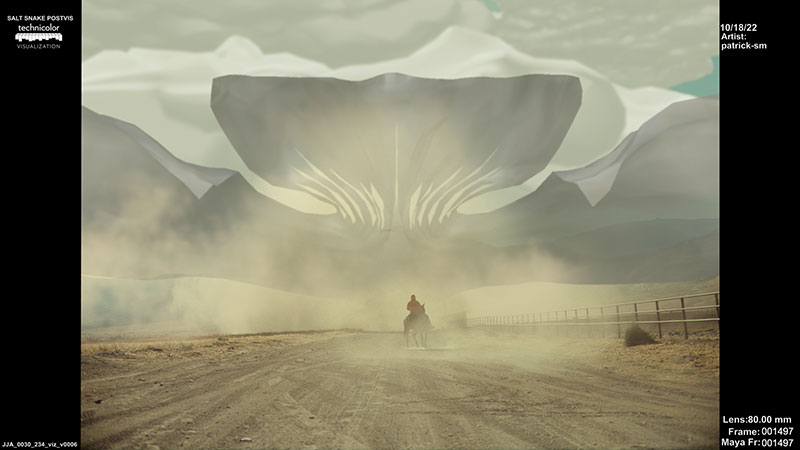
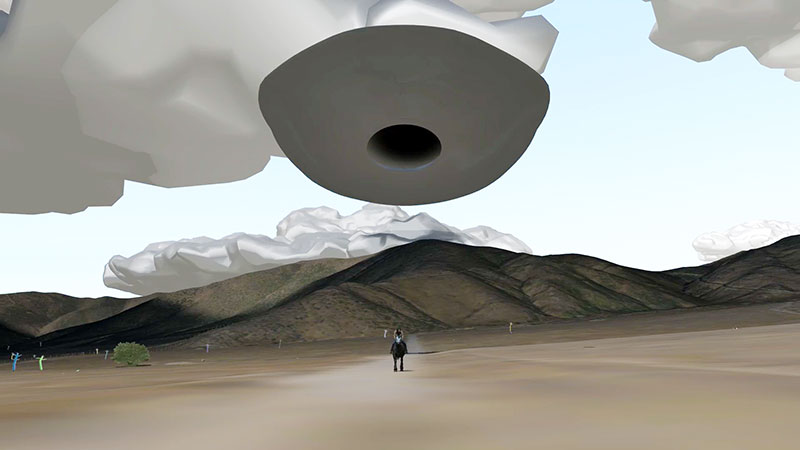
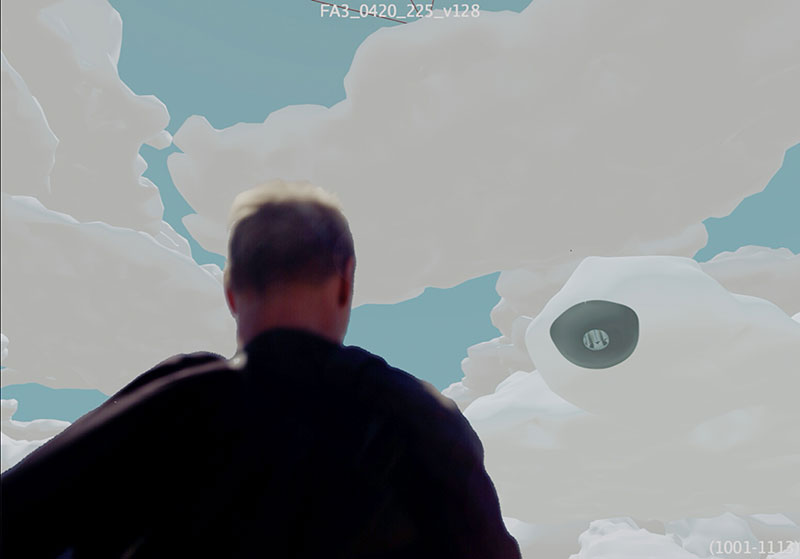
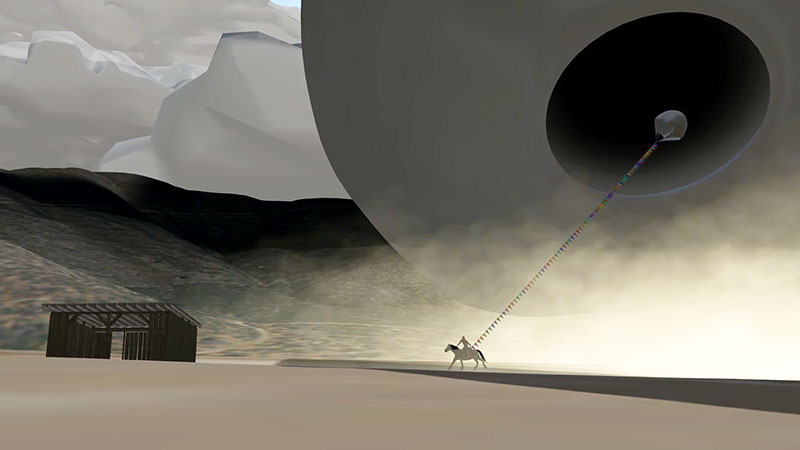
Postvis frame for the composite shot above.
Jean Jacket
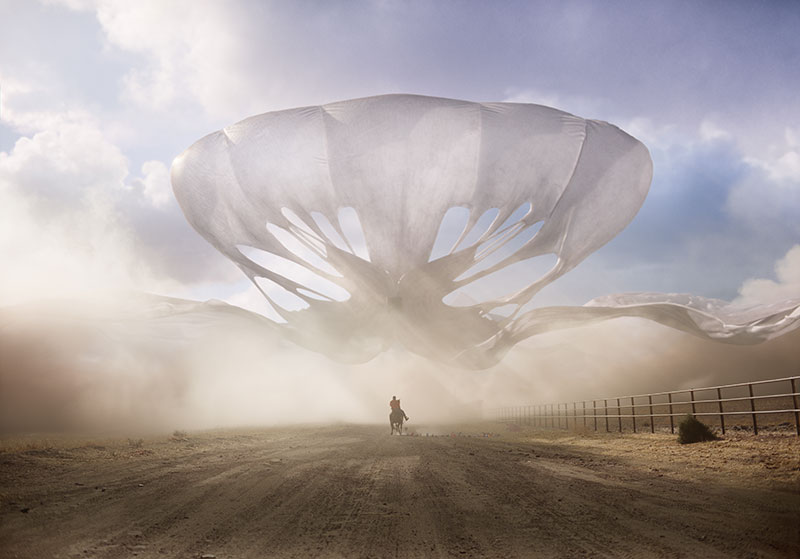
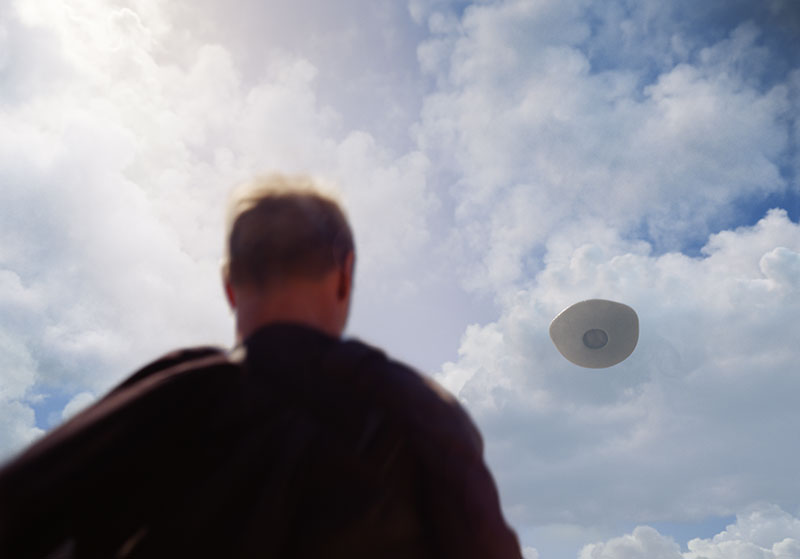
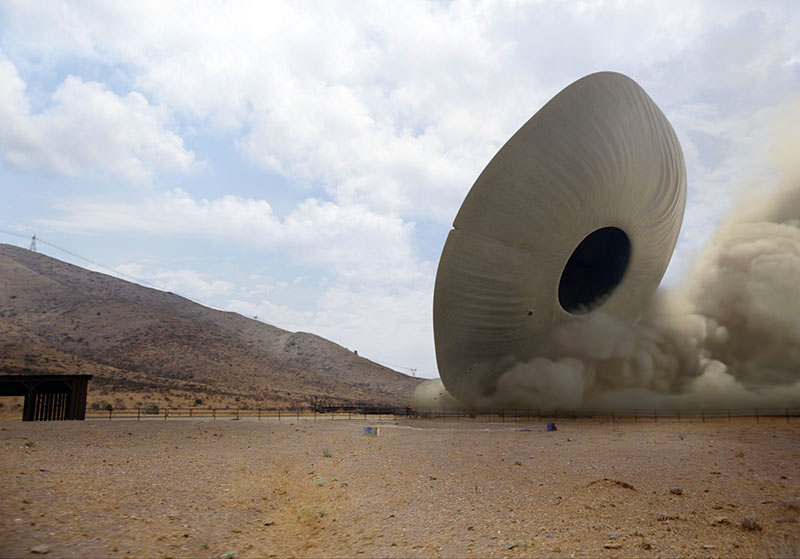
The artists’ primary challenge was creating the alien. Initially hidden behind the clouds, this creature-character undergoes a transformation in the story and evolves from a space ship-like saucer into a full-blown, massively large, alien entity that wreaks havoc across the ranch. The team’s first task was fully acquainting themselves with the alien, which the protagonists name ‘Jean Jacket’ after a horse they had grown up with on the family’s ranch.
Leandre Lagrange, Art Director at MPC, recalled his first conversation with Jordan Peele about the project, when he was trying to understand its behaviour. “One key factor that stood out was that he used the word ‘origami’ to describe the transformation,” he said. “That is why one of my first versions of the creature design was heavily influenced by the notion of folds and the beauty and rhythm of the lines created by folded paper, how something compact can expand to enormous proportions through unfolding. As a result, origami was the primary motivation behind the opened version of the creature.
“We did a lot of exploration around that idea and tried going in other directions, too, even trying to improve upon this early version, but we ended up coming back to the original idea and shape every time. Marrying the language of folding with reference to living creatures – we researched deep-sea creatures, shellfish, insects, light phenomena and so on – gave us a unique entity.”
As the script evolved, so did the level of horror and the predatorial quality of the creature. Finally, the ideal of sailing the wind and existing in total harmony with the element it evolves into was a significant factor in the design. The sea creature reference gave the team a starting point in shape language, and from there they quickly transitioned to sails, gliding and parasailing.
Motion
For the visualisation work, the previs team’s asset artist added controls to their 3D model that the animators used to keyframe the creature’s motion to show it transitioning to different shapes throughout the third act.
Josh Lange, Previs Supervisor at MPC, said, “Since the creature could also change direction and travel in response to the person looking at it, it needed a defined ‘front’ and ‘back’ to make it clear where it was heading. Jellyfish and drapery were the closest real-world reference, and we gave massive scale to the ‘wings’ that undulate and push air below the creature and give a believable explanation for how it could stay afloat at will.”
As design options were pitched during the concept design stage, the artists helped show how these would look in motion with mockups and animation work. Early on, there were saucer options that were smooth and symmetrical, others that looked rougher and organic, and one with a notch cut out of the rim of the ship.
Animation Model
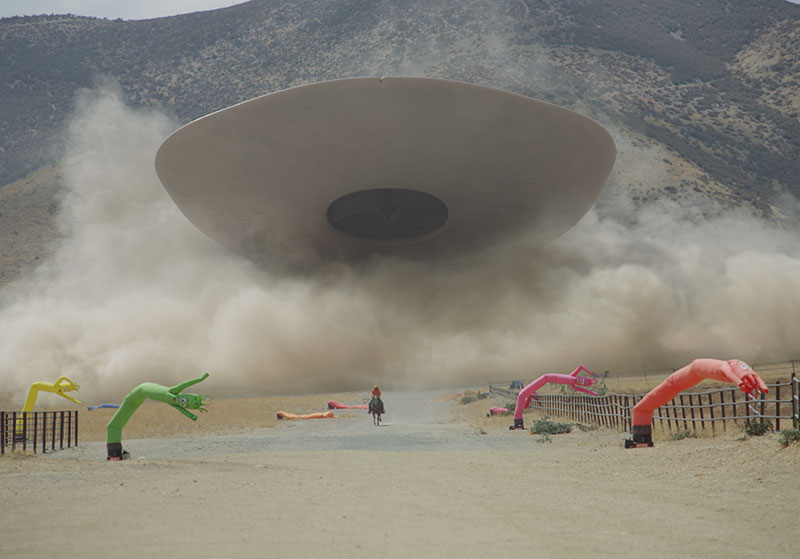
In the end, a smooth ship with a slight notch in the flat front edge served the story the best. Not only did it combine the look of a traditional UFO with slight organic imperfection, but the notch in the front was also a clue to the direction it was travelling in, and clarified whether it was facing or pointing away from the characters.
Previs
Josh said, “It always helps to have a model of some kind when communicating animation notes, but for this show I couldn’t just rely on Hot Wheels toy cars or action figures. Instead, I cut off the edge of a takeout lid, marked a black circle on the bottom, and used it in my video calls to help illustrate the subtleties in the motion.
“We iterated so many times on some scenes that by the time the shot was approved, the final VFX animators had a great 3D scene file to start with, knowing that the director had consciously tested out different performance options before approving the postvis shot.”
In the third act, the entity expands from a saucer [the ship] into its impressive final form: a fearsome spectacle that demands attention from anyone nearby. Josh was even more at a loss for an animation model for this form, often acting out its movement with his hands to give the team an idea of what they were going for as it spun in place and floated in the sky.
At Home in the Clouds
The relationship of the Jean Jacket with the clouds and the sky was a critical story point to communicate to the audience. Leandre said, “One artist in our team, Ivan Khomenko, spent weeks studying skies and clouds, while painting the creature interacting with and hiding in the clouds, and figuring out how the sky would evolve through the movie to support the story and the mood.”
At a pivotal moment, OJ and Emerald Haywood notice the stationary ‘home cloud’, in among the many clouds populating the impressive sky over the ranch. Jordan described it to the team as akin to the Jean Jacket’s nest, where it retreated after hunting to digest its victims. Much care was taken to design this cloud's size, position and appearance – normal enough to blend with its surroundings, but to also be recognisable if you know what to look for.
Josh said, “In the third act, the Jean Jacket ship uses the arrangement of clouds like a checkerboard, moving carefully around the empty spaces between clouds so it could remain unseen. As ‘Jaws’ was a significant inspiration for the film, the clouds were meant to play the same role for the ship that dark ocean water plays for a shark, making it hard to know exactly where the creature was at any given time.”
Mystery, Suspense and a Sense of Wonder
The notion of stalking and showing Jean Jacket peeking out, silhouetted in the clouds, going from one cloud to the other – it all required intense attention to design, as it’s impossible to think about the Jean Jacket existing separately from the clouds. Josh and Leandre’s description explain the role the clouds play in the story, but creating and bringing them to life was a major focus for VFX Supervisor Guillaume Rocheron.
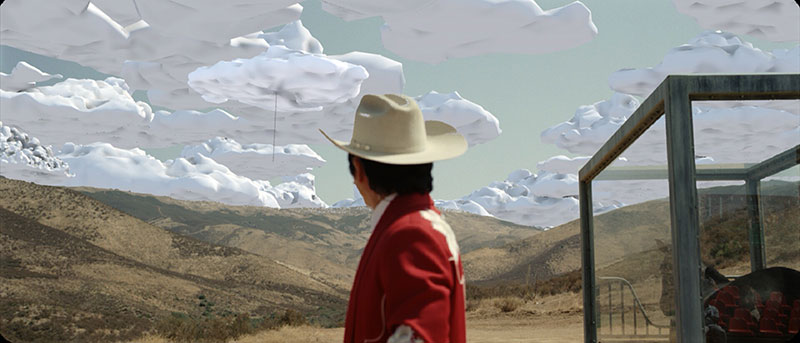
“None of the clouds you see in the sky, or the sky itself, were real,” he said. “But the sky and clouds were so important to our story that we also couldn’t use normal sky replacement techniques. We had to take a different approach all together.
“The production was filming out on location the whole time, without relying on blue or green screen shoots. Fortunately, the location was in the arid, open country around Agua Dulce in Southern California, which meant conditions were fairly consistent throughout the 80 day shoot.”
The real-world location helped them, but they still needed an elegant, reliable way to be able to control every part of the sky at every moment. As well as being the home environment of the Jean Jacket, the clouds needed to generate mystery, suspense and a sense of wonder for the audience.
Cloud Control
“From now on, we wanted the members of the audience to feel compelled to look at the sky over their heads differently. Is something there, behind those clouds – or not? The clouds became a playground, and the sky itself was handled like another set location,” Guillame said. “Instead of something pretty that attracts attention, we were aiming to create a skyscape that is completely integrated with the rest of the image and the story, and is highly art directable over time.
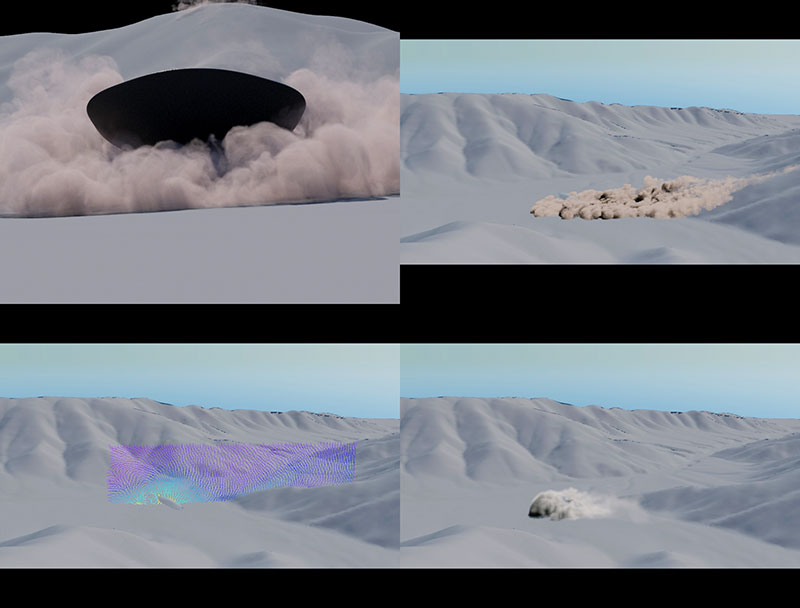
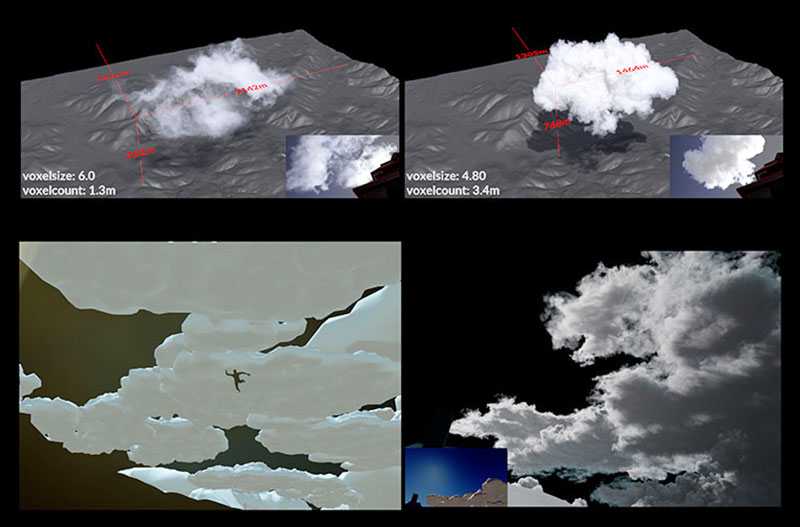
“It was for those reasons that a traditional sky replacement approach wasn’t going to work for us. We needed to be able to generate specific clouds, give them volume, light them and move them around in a controlled way. We knew that simulating the clouds would give a more realistic result but that keyframing would give us the control we needed. So, we built up a library of cloud geometry in Houdini, comprised of different shapes, sizes and outlines.
“In layout, serving here as a staging process, we first designed the cloud footprint with thw geometry, then generated the simulations in a natural way and then proceeded with animation after that.”
Voxels – which form the grid for the sims – were useful to control the resolution of the clouds. Nevertheless, fluid simulations were always going to involve massive render times, especially for the IMAX deliverable. So they made small volumes, small pieces of cloud, instead and scattered these, allowing them to break up the renders but still create enough detail. These approaches eased the render time required for beautifully detailed, expressive volumetric data.
Meanwhile, light was a constantly changing factor on location as the sun kept moving throughout the day. Precisely matching whatever light was recorded in the plate, shot by shot, in the 3D work was essential to achieving authentic cloudscapes that harmonised naturally with the photography. On set, HDRIs were captured continuously as the shoot proceeded. As the sky was always a fairly uniform blue, they could use that colour to pull a key for inserting the clouds.
Conveying SIZE
An important part of animating the ship and the unfolded creature, and compositing it into plates during the postvis process was its overwhelming size. Ensuring that it both was visible, and honoured the spirit of the previs and Jordan’s notes, wasn’t always straightforward.
“The framing of the plates made this difficult at times, and on some occasions, we shifted the whole image to help centre the ship in the frame. When ‘cheats’ like this were made, we notified the finals team in Montreal so the layout artists could recreate our work before it was passed through to the final renders,” Leandre said.
While its huge size meant it was visible over longer distances, that sometimes led to interesting animation challenges. During its aggressive attempt to abduct a horse, for example, it drops extremely close to OJ (the main character) at ground level. In that situation, the team animated it to move like an enormous animal, and also made sure it moved at realistic speeds – “rarely breaking the sound barrier”.
Previs
Such sequences also needed to include dust that the creature would have stirred up from the valley floor. A helicopter was used during the shoot to kick up some real dust.
Josh said, “Of course, because the unfolded entity was many times the scale of a helicopter, the practical dust in the plate ended up being only a portion of the final dust effects and had to be augmented with simulations in post. However, having that dust on set and in the plates served several purposes. It was very helpful for determining wind direction, for instance, and helped the camera crew and the actors understand what the director was aiming for on that huge set, and where.”
Dust was also one of the clues the team used to help the audience understand the scale of Jean Jacket. Starting small allowed them to experiment with size in each shot depending on the camera, aiming for realism plus drama and, in the end, always relying on physics.
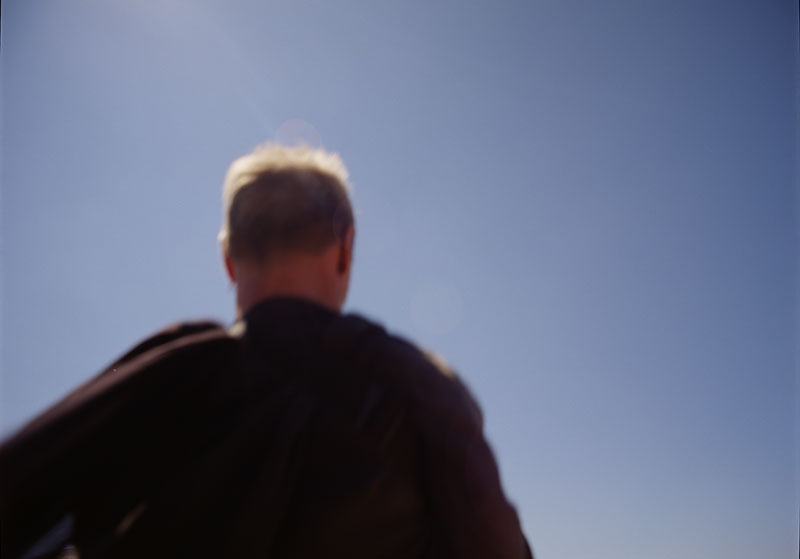
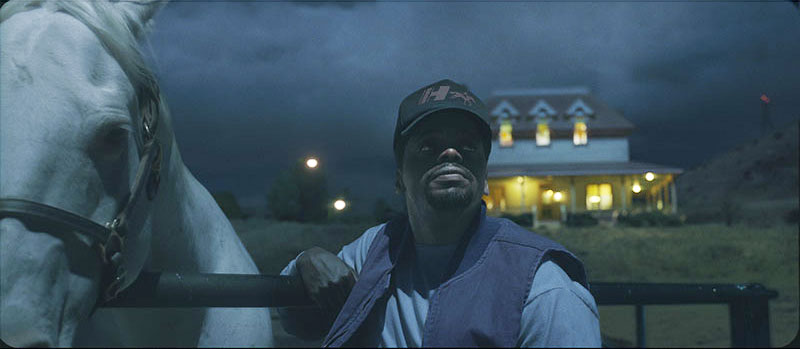
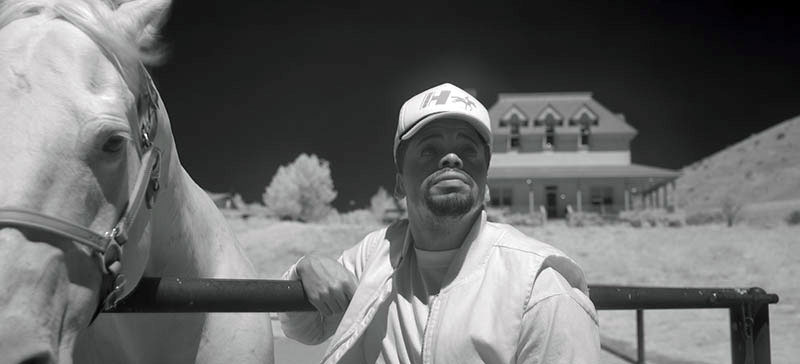
Day for Night
Some scenes in the story take place at night, which meant making decisions about how to organise the shoot, and how the images should be handled in post. Guillaume said, “Together with the production’s DP Hoyte van Hoytema, we were very interested in recreating the human vision experience of seeing at night, not just going with the way film cameras see at night and trying to make that work cinematically.
“Traditionally, filmmakers have used smoke on set to create a dim atmosphere and worked with silhouettes, or simply shot when the sun was very low while avoiding capturing the sky in the frame to prevent breaking the illusion.
“During our discussions, we went out on set at night and carefully observed how our eyes adjusted to the darkness and what happened to our vision. Hoyte mentioned to us that IR (infrared) cameras will record the sky as completely black when shooting during the day. Also, the image contrast in IR images is much more similar to the way eyes see at night than the contrast a normal camera records on a darkened set. The main limitation of IR cameras is lack of colour in the recorded image.”
Hoyte built a rig fitted with an IR cam plus a colour film camera precisely synced and aligned to capture the exact same scene, each with its own characteristics. Then in post, MPC developed techniques for combining the images. In effect, the process colourises the IR shot, using the colour information from the regular camera – that is, taking the contrast from the IR footage, and injecting colours from the film.
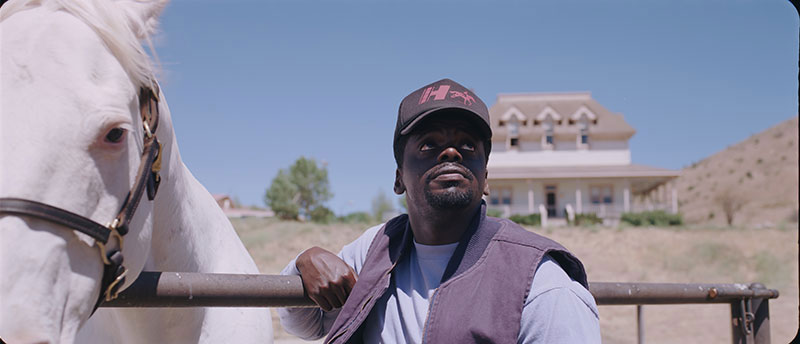
The cameras used on the rig were one of the Panaflex 65mm film cameras, which is what most of the rest of the movie was shot with, and an ALEXA 65 camera modified to shoot IR images. All scenes could be shot in daylight, including the sky, which was convenient although the cast had to be careful about squinting – no sunglasses, please.
Colour Modulation
The work in post involved adjusting for the way colours tend to modulate within a shot according to their distance to camera, which made the job more complex. Closer objects appear to have more colour, distant ones have less. To keep control of what was happening in the shots, they tracked the camera in order to extract the 3D depths of each frame and used this information to modulate the colours against the IR image data. This was especially important for certain elements like faces.
The colourising process was customisable for landscapes, skin, eyes and so on. Extracting the depth information helped to standardise the work to some extent, taking the artists perhaps 80 percent of the way, but the last 20 percent needed to be tweaked and perfected individually,” Guillaume said.
“So, though it was a complex equation to define that IR camera look and arrive at a natural result, our VFX team loved this chance to work with Hoyte. It meant that, between the DP and his crew, and our artists, we had an opportunity to really design the image – testing cameras and rigs, engineering the camera set-up and engineering the image itself. In the end, we achieved the ultimate goal – the audience never has to think about any of those processes and can just be immersed in the story.” www.mpcfilm.com
Words: Adriene Hurst
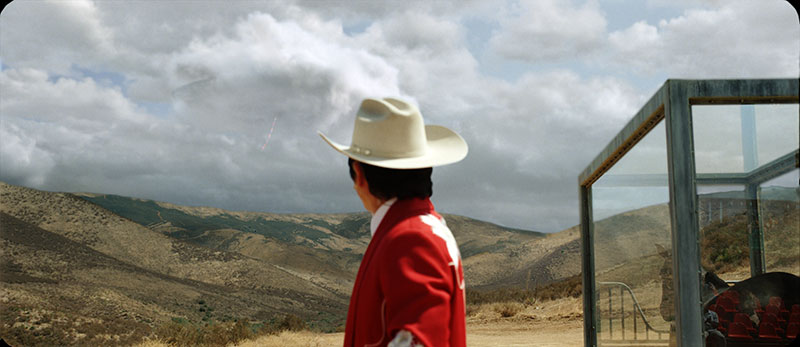
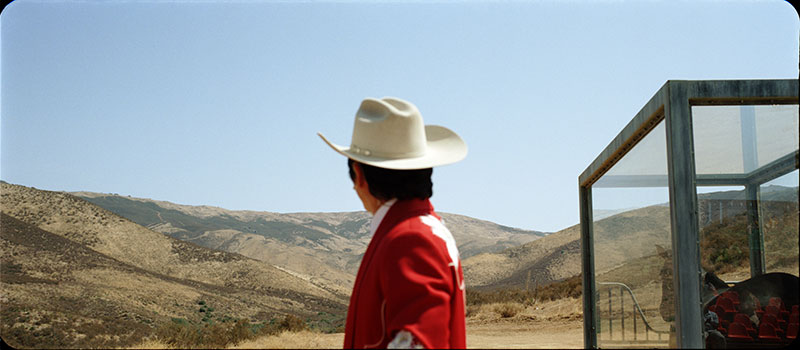
Final Photo Credit: Courtesy of Universal
Previs Photo Credit: Courtesy of MPC


