

The team at The Finish Line talk about working with video, captured around the world on myriad cameras, in DaVinci Resolve using tools from Colour Management to Fusion to lighting FX.
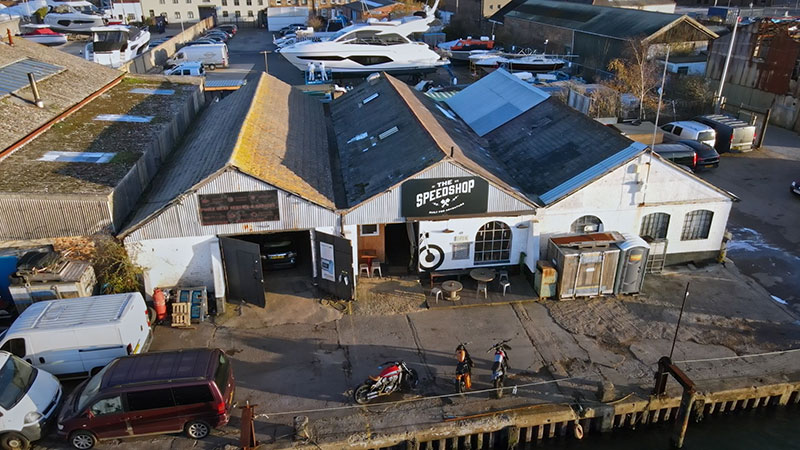
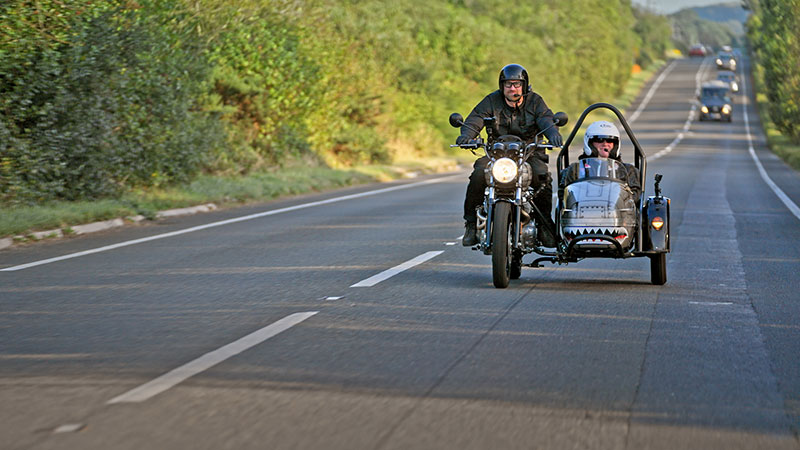
BBC Two series ‘The Speedshop’ follows motorcycle enthusiast Titch Cormack and his team, who convert and create specialty vehicles from a waterfront workshop in Poole in Dorset, England. In its pilot episode, released in 2020, the team was presented with a challenge: building a motorcycle for an amputee to take on a journey across the Alps. The project turned into an adventure, and left viewers wanting to see more. Back by popular demand, BBC Two has recently released six more episodes, starting on 20 March 2022.
"We were working on a very tight budget,” said Grant Wardrop, who developed the series and took the role of executive producer of Grant Wardrop Productions. “However, our small team punched well above its weight to produce an exciting, ambitious first series on a global scale that looks fantastic."
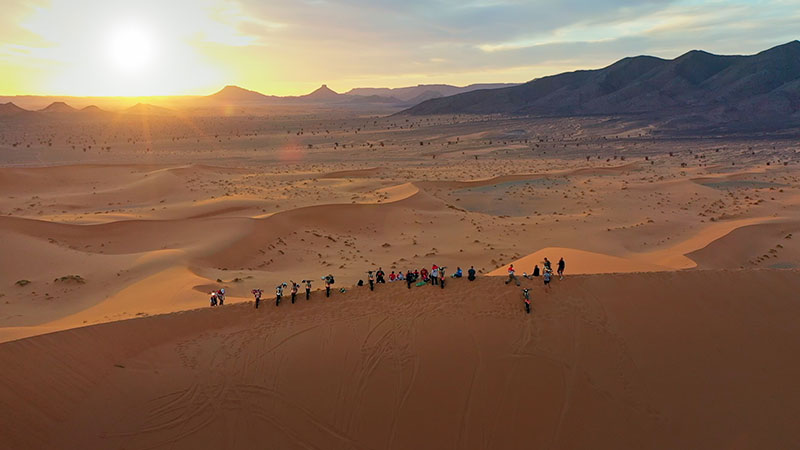
Visually, the series takes viewers from the gears of an engine to snow covered peaks. Each episode tells its own story, as Titch Cormack and his charismatic team use their skills to uncover new adventures. The Finish Line in London handled post-production, from beginning to end.
Ingest and Backup
Rushes would arrive from shooting locations around the world. Material was ingested using Blackmagic Design DaVinci Resolve. Lily Ketley, Technical Assistant at The Finish Line, said rushes were backed up to multiple drives on location, sending one copy to an external office. “We also back up onto our storage here, which is mirrored into MatrixStore Cloud as another offsite backup,” she said.
“Then we prep all media and bins in DaVinci Resolve, spot check for issues and transcode to DNxLB 720P proxy files for offline editing in Avid Media Composer. Transcoding makes file sizes more manageable for the editors and puts less of a strain on the machines. It also means the offline material is all uniform, regardless of what cameras or archive suppliers it has come from, which is a good way to improve stability.
“After ingesting the offline media, it is stored on a central server and a copy is delivered to our cloud service, LucidLink, as a backup. Editors would pull down any new media as it was made available from Lucid to a local drive. This protects them against variable internet issues at their different locations.”
Editorial Access
Via LucidLink, editors had secure remote access to the media and projects, and could share timelines and assets as needed. Editors just needed to install LucidLink and log-in with the file space name, username and password. Each one has their own levels of read and write access to certain folders, controlling media acquisition and collaboration. Lily said, “We manage all of this from an admin console where we can change or revoke permissions as required. LucidLink also continuously backs up projects and creates snapshots should we need to revert to older copies at any point.”
Resolve was used for the inital ingesting process not only because it can ingest several times faster than ingesting natively in Media Composer, but also because it allows them to set up a colour managed pipeline that runs through to delivery. Since the crew had used many different types of camera throughout the shoot, using the DaVinci Colour Management system was critical as a start point for finishing and the colour grade. Cameras included a Sony FX9, a DJI Mavic 2 Pro for drone shots, a GoPro, Blackmagic Pocket Cinema Camera 4K and 6K, Ambarella Dashcam and others.
DaVinci Colour Management
Each serving a different market, different cameras capture the same scene differently. Consumer cameras generally capture images that are ready for viewing, with richer saturation and contrast. Professional cameras, on the other hand, assume that users will want to process the images to give them a specific look.
Instead of only capturing colours and light the way they look in reality, professional cameras capture footage with a log curve that preserves much more light (or luminance) data within the image. Regular video curves compress highlight information by storing less data in brighter areas while, in contrast, the log curve makes the most of dynamic range and also stores each stop of light roughly equally. The result looks unappealing, but because all the colour information is present, the colourist can push it in various directions to create a look in post, instead of in camera.
Furthermore, lots of different colour spaces exist in which to represent a scene, not only at the shooting end but also for deliverables – for broadcast television, for cinema projectors and for HDR output such as Rec 2020. With so many colour and luminance options from set to post, colour management is a way to simplify the situation.
Working under the hood with the settings in DaVinci Resolve, colourists can remap the start point of the footage into a certain working standard and then deliver that into another standard for the deliverables – all in the background – while preserving the maximum signal integrity throughout. In practical terms, colour management takes video from a range of cameras, brings them into the same space and makes them look as expected, almost automatically.
Camera Originals
Lily said, “Once the cut is complete, we can export the AAF from Media Composer and import it to Resolve, which links to camera originals in the conform.
“This only takes a few minutes and then just needs a shot check before handing over to the picture finishing team for final post. That means all the colour management is also in place from the ingest, further speeding up the process. Working from camera originals at this stage ensures we are working with the best quality material and that no unwanted conversions have been applied.”
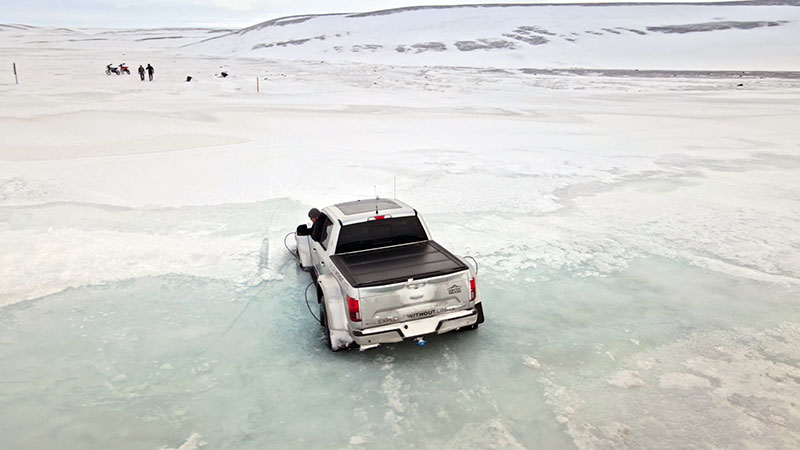
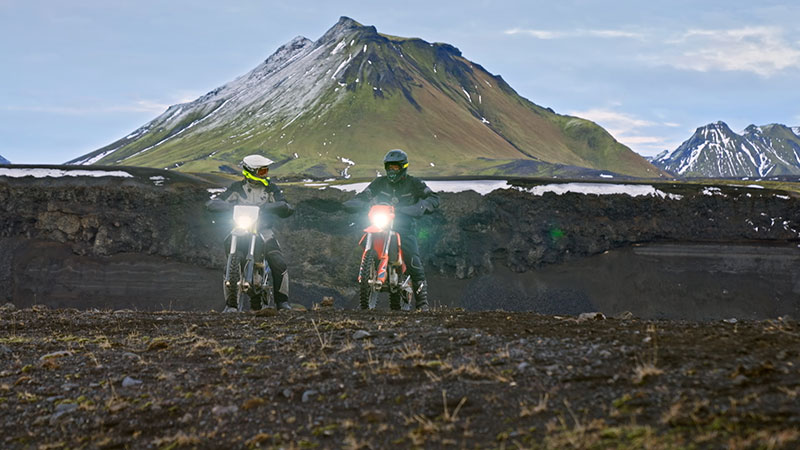
Looks from Workshops to Sunsets
With a unified look in place, Finishing Artist Ben Lee could start on the grade, effects and the storytelling side of post. “The series was a mixture of mechanics in workshops and the broad shots of landscapes in Iceland, Morocco and the UK. Due to the use of so many cameras, and to filming in all weather in varied locations, the approach had to be different for each episode. Some shots also needed compositing to add or remove signage and so on, which were handled within Resolve’s Fusion tab.
“The overall brief was to make the series feel warm and vibrant, particularly when we see shots of the team travelling across the landscape. As a contrast, we created a more gritty feel in the workshop – contrast, midtone detail and colour temperature were key to that look. However, with the location shoots, a key element was the sunset rides that feature in several of the episodes. This meant adding warmth and additional flares to the scenes to bring that feel-good vibe the client was after for its Sunday night slot.”
Ben used several plug-ins and tools for adding organic, realistic lighting effects. The glows, lens flares and lens reflections in the Resolve FX Light tools helped to add atmosphere across the series. Distinct from Fusion’s compositing tools, Resolve’s Color Page has a library of over 85 GPU and CPU accelerated Resolve FX plug-ins. “They can have a great effect when used subtly. For example, I used lens flares on drone shots throughout the series, and polished and stylised some big reveals of the motorbike builds by adding lens reflections and glows.”
The tools are organised into categories in the Open FX library -- blurs, colour effects, glows and lens flares, vignettes, refinement and beauty tools, image restoration, sharpening, stylize, texture, transformation and warpers. Once they are added to a node, the artist can adjust and keyframe different values through a shot. Third party Open FX plug-ins also appear in the library.
Warping Colour
Ben also liked using the Colour Warper tool to tweak the colour on natural features like grasses and skylines, to bring a warmth or chill to the muted outdoor scenes. It controls both the hue and saturation at the same time, which is much faster than using two separate panels. He said, “This is a great tool for quickly grabbing and changing a specific hue while adding more or less saturation in one control. It works like a web over the colour palette and allows you to find the desired hue easily. I liked to use this on grass, trees and any greenery when the team were out in the English countryside.”

In total, Ben worked through about 1,200 to 1,400 shots per episode for the series, working entirely remotely while the client used a calibrated iPad Pro with the Moxion app for review in final post. “We have a process to set up the iPad Pro in our remote viewing kits and within Moxion.io,” he said. “We can configure it to force the iPad into different brightness settings for SDR and HDR reviews so we can line them up against our reference monitors and ensure that they match as closely as possible across devices.
“We combine that with very specific settings we create across the different review files. Regardless of whether we are working in HD SDR or UHD HDR and Dolby Vision, this process ensures that all the files match our reference monitors when viewing within Moxion.” www.blackmagicdesign.com