|
Adriene Hurst interviewed VFX Supervisor Alex Romano at Company 3 and members of his visuals effects team Tom Kendall and David Neuberger from Encore Hollywood about the work they put into this film, and spoke to Stephen Nakamura, also at Company 3, about adding his colourist's touch to the footage. But perhaps what sparked our interest in the film most was a conversation with Cinematographer Barry Ackroyd, BSC, who told us about his choice of film, 16mm Fujifilm, Aaton cameras and his experience shooting with Kathryn Bigelow in Jordan. Their efforts have paid off now. The film has earned four Oscar Awards - for Best Picture, Best Directing, Best Film Editing and Best Original Screenplay.
Alex Romano started work on ‘The Hurt Locker’ as far back as 2008, after the principle shoot and the DI were complete, with the completion of the first locked cut. His primary role was as the Digital Intermediate Online Editor, assembling the scans, done in-house at 2K, according to the edit decision list.
As is typical at this stage, although a certain amount of effects work had been anticipated, a need for many others emerged. “Scanning and viewing footage in an HD environment, like the assembly bay or the DI theatre, almost always reveals more work to be done”, said Alex. “That’s why effects are often a part of the assembly and online process. A lot of this, as in ‘Hurt Locker’ might be removing production gear, stray people and elements that break from the narrative.”
Cleanups and Fixes
On this project, the DI producer Erik Rogers believed that Company 3 could handle most of the effects themselves, if only because at first there didn’t seem to be many shots to work on, and a dedicated VFX Supervisor and extra staff seemed unnecessary. It looked as though the work would mainly be confined to cleaning up inconsistencies - stray elements, curious locals and road signage for destinations in the shooting location, Jordan, instead of Iraq.
“In fact, casual spectators hanging around the shoot locations were a constant problem. Toward the end of the movie, a scene with a suicide bomber in a large plaza attracted lots of passersby who climbed up on top of the surrounding buildings and had to be removed later. The production crew was quite small and didn’t have the usual protection from crowds like a large filming unit does,” said Alex. “They also lacked the elements required to make their setting look like wartime Iraq. These kinds of fixes became Company 3’s job.”
3D Assistance
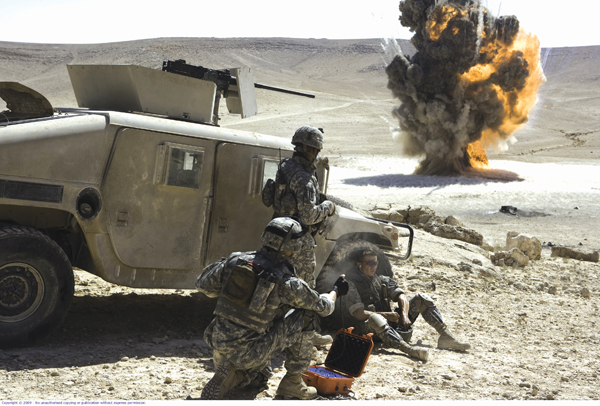
Alex could achieve a certain amount of combat zone enhancement via 2D compositing on an Autodesk Smoke system, which has virtually all the capabilities of the Flame. “However, two groups of shots did require CG elements, which is why we had to enlist some help from Encore Hollywood. For example, at the start of the movie, an explosion kills the bomb defuser of the story’s American unit. The Director Kathryn Bigelow wanted to make this very large to express the deadly nature of the explosion.
“The practical pyrotechnics hadn’t been nearly as impressive as she had hoped – she wanted to double the size, and enhance the looks of the blood spattered inside the soldier’s face mask. “Since I felt that both tasks could be done best with CG, and both showed up in the same scene, I sent the sequence to Encore.”
Tom Kendall, whose role at Encore is VFX Producer, stepped in to work mostly with 3D elements on this project. “In the case of all the work on the film, the main unit shot real explosions and had practical debris flying through the frame. Our work was always to enhance with extra debris or fire or small fragments flying around. All of our compositing work used Inferno. All the 3D work was created in 3D Studio Max, with tracking/compositing work in Inferno. The debris was created in 3D and comped in 3D with the addition of various layers of smoke and dust. Company 3 provided us with an LUT that we could apply to the raw DPX files so that we could make sure that what we did worked with the film.
Tackling Explosions
“We didn’t have to create any purely CG explosions,” Tom said. “The cast and crew did a wonderful job of creating and portraying explosions at the locations. But, as with anything like this in a movie, there was a desire to enhance it, make it bigger - more shrapnel, more debris, more smoke, more fire. That's where we came in.
“We could enhance their explosions in several ways. We have smoke elements that were shot against black and some real fire as part of our library, and we can use 2D and 3D tools to create more. For any work that involved any kind of 3D manipulation at all we used 3D Studio Max.
“This project wasn't so much about CG or live-action props. The majority of our work had to do with elements like smoke and fire and flying debris from 2D and 3D CGI and from some live-action elements we have in our library and then affecting them with attributes like depth of field, lighting and contrast so that these multiple layers all look like they were part of the original action. Once we got the plate, we built and composited our elements so that they looked appropriate. This particular kind of work is something you really do by eye.”
|
16mm Grain Structure
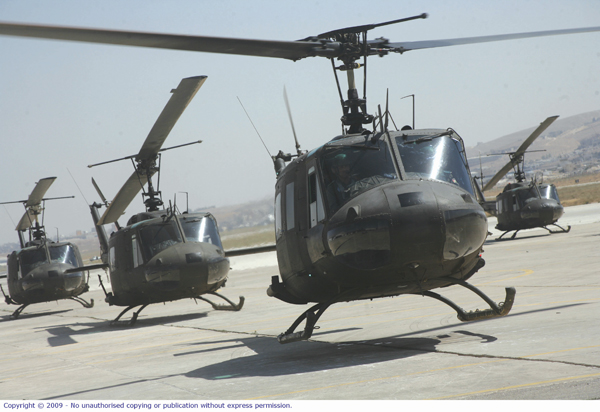
DP Barry Ackroyd, BSC had shot ‘The Hurt Locker’ on 16mm film with an Aaton A-Minima as his principle camera. It was a camera he was familiar with and liked from his extensive work making documentaries, and was partly responsible for the documentary style of the film. For hand held work he sometimes used the Aaton XTR Prod, which is quite small.
The 16mm footage has a much larger grain structure than 35mm or digital footage. Any compositing work had to be regrained and given a contrast in colour space to match the quality of the rest of the image and avoid looking artificial or standing out. Alex said, “The Regrain tool in Smoke and Flame is usually excellent and doesn’t add a lot of work, once you get the hang of it. My approach to any regrain situation is to try each tool in our toolkit in order of their speed of use to achieve a satisfactory result. After that I rely on experience to know which tool works better than others in any given situation.
“In this case, Smoke’s Regrain wasn’t as useful because it doesn't recreate grain large enough to match 16mm. To work around the problem, I was using either GenArts Sapphire Regrain or Furnace Regrain from The Foundry. Both had different advantages, depending on the brightness, contrast and complexity of the image, and gave good results. I also found that Sapphire Noise was sometimes useful - and a much faster renderer - in very dark areas of a given shot.
Alternatives
“The drawback of these regraining alternatives, especially Sapphire, is that their grain emulation is based on a video-gamma image so the results need to be viewed in a log environment and adjusted accordingly. Also the final grade being applied in the DI needs to be taken into consideration, which is why I had to use alternatives like Sapphire Noise keyed into the darks in a couple of cases.”
Alex often tried to avoid the need to regain entirely by using elements from other areas of the camera-original material. For instance, to eliminate a spectator standing in a doorway, he took a closed door from another shot that could be manipulated and tracked into place with Smoke with a minimum of transformation, specifically to ensure the grain structure of the patch would be a good match. On most other projects shot on 35mm or digital cameras, a painted clean-frame, with a regrain on the patch, usually works well.
2D elements, whether when making scenes look more like a combat area, adding flashes or augmenting explosions, were often sourced from existing footage found by looking through dailies tapes and requesting scans to be pulled down, because they would have the right scale and texture and so on to fit in well. Flashes could often be pulled from stock footage. Not much special shooting had to be done.
Phantom HD Slow Motion
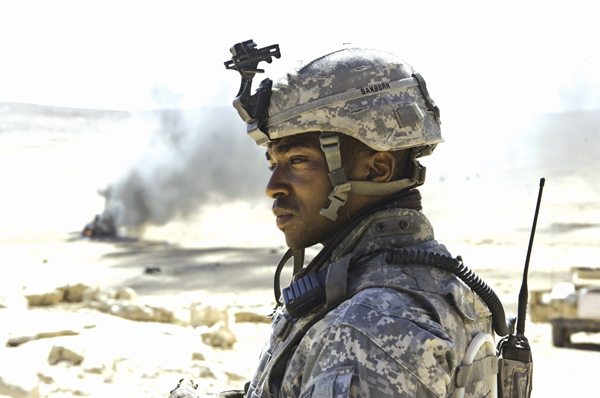
Some of the footage was recorded at very high frame rates on a Phantom HD camera for extreme slow motion used for explosions. Most of these elements could be treated sufficiently in the DI bay, where the colour space could be adjusted enough to intercut with the film based material without worrying about grain. “The extreme slow motion the Phantom was used for creates a ‘heightened reality’ anyway, for a dramatic effect,” said Alex. “Letting it pull away from the general grainy look allows viewers to pause a moment and really experience how much time changes and seems to freeze at such critical moments. It was effective use of the Phantom and of intercutting these elements.”
Suicide Bomber
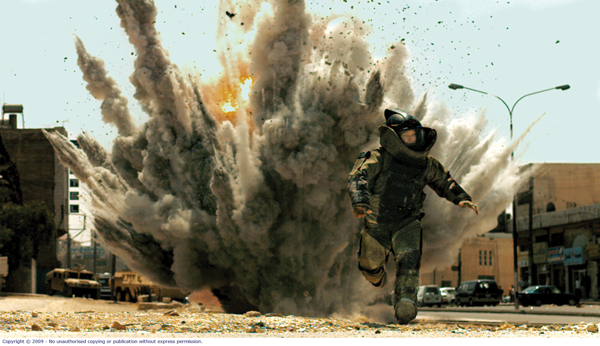
Dave Neuberger, a VFX artist from Encore, said, “Like all projects, a portion of the work was experimental. There are always multiple ways to approach an effects shot. I try to rely on my past experiences to figure out the best approach.” Working mainly with 2D elements, Dave focused on a scene featuring the spectacular explosion in which an Iraqi suicide bomber explodes in the street. Creating effects involved two main plates and some additional explosion plates, plus elements collected from other footage such as body parts.
In the first plate, the Iraqi man in the middle of the street is strapped with an explosive vest. In the second plate, a mannequin in the street is blown apart with a small explosion. “The tricky part of cutting these plates together is lining them up so nothing pops from one plate to the next. This involved correcting the lighting, removing crew members, fixing camera shifts and other slight differences. Once the plates lined up, I used the explosion itself to reveal one plate through the other and then added larger explosion elements, dust, body parts and camera shake to enhance the explosion effect.”
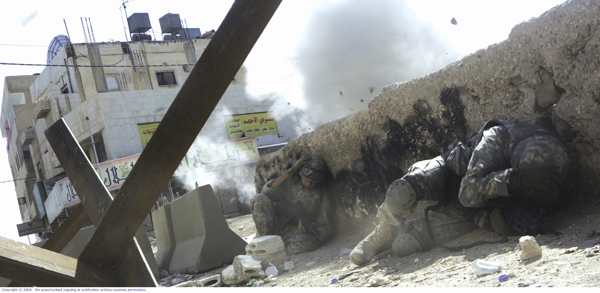
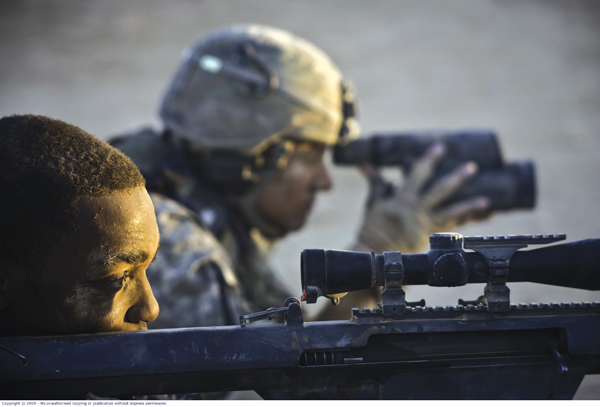
Desert Firefight
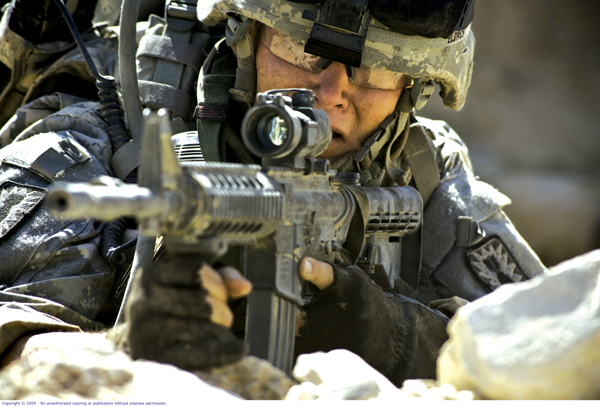
“The Encore team was also important for a desert fire fight where the unit encounter a group of British mercenaries. A couple of characters are shot, and we wanted to augment the wounds effectively at the point of impact to make it clear they had been hit by high powered rifles. Most of the battle sequences also required a lot of muzzle flashes to intensify the appearance of a fire fight,” said Alex.
The sequence contained the highest density of shots to work on – muzzle flashes, explosions, augmenting shells going off. In particular, one long sequence involving a 50mm rifle to take out a sniper required major work. The muzzle flashes, seen through the scope of the sniper shooting the American soldiers, were entirely composited as well, whether specially created with 3D Studio Max or from stock, as was most of the heat haze added to help tie in the flashes, all while maintaining the 16mm look and feel.
Tom Kendall said, “We were fortunate in that this scene was filmed in a very wide shot. You didn't need to be too distinctive about individual body parts, and because we were viewing the scene from a distance, we could do that kind of work in 2D.”
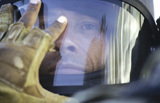
Rifle Scope View
In this scene and throughout the movie, the point-of-view of an Iraqi soldier looking through his rifle scope at the Americans was often used, and had to be created with effects. “The classic addition of crosshairs wasn’t really working, just because it didn’t feel ‘real’”, said Alex. “All we had to base our work on was some long telephoto lens shots of people on a tower balcony, for example. At least these had the compression of distance in them.
|
| We looked at some references to find out exactly what the view through a scope would look like. Gavin Milkovich here added elements on the Flame system, a dark vignette and distortion around the sides, to about 20 to 25 shots. Flame has better distortion tools than Smoke, and at that time, had a more powerful batch compositing environment, although Smoke has improved by now.”
Colour Grade
The colour grade system at Company 3 is the Da Vinci Resolve. The footage was scanned in house to 2K files. Colourist Stephen Nakamura has been working on the Resolve since 2007. Though he mostly works on 35mm film, he’s found that 16mm footage only complicates his work if it hasn’t been exposed properly, especially if underexposed.
“But this wasn’t the case for ‘The Hurt Locker’,” said Stephen. “It was exposed really well and the grain wasn’t much of an issue, so we could simply do an extraction from the 16mm. It also really suited the content of the movie – which included lots of hand held footage. The grain actually benefitted the look, although it might have been a problem for some other style of movie.”
When Stephen met with Kathryn after the scan to discuss the message and feeling she wanted to convey, he had carried out the initial correction for her and noticed the environment. “There was very little vegetation around, white buildings, white sand, a very stark environment. But the lead character Sergeant James actually idealises the time he spends in Iraq. So while everyone around him hates the place, he loves it, loves the thrill of working on the bombs. Like anyone in a thrilling, satisfying experience, he idealises it in his mind’s eye.”
Storytelling in Colour
Kathryn said that she didn’t want to give the film a typical warm, orangey look, like some other films set in the Iraq war. So Stephen decided to deliberately enhance the colours of the green uniforms. “Also, making the photography ‘warm’ makes the green disappear. Then I decided to pull up more blue in the sky and saturate it, pulling a lot of keys in the sky while running the corrections fairly neutral, and forcing colour into the film, such as when he’s cutting the wires on the bombs and you can see their colours. I wanted to help tell the story through colour. Sargeant James finds the Middle East really beautiful, so any kind object we could find to emphasise, we pulled out as much colour as we could. Kathryn really liked that.
“Night scenes, such as when James goes out into the town one night to visit a family’s home, were all shot in very low light. These came up even grainier, especially the exteriors. That factor in itself made us pull out as much detail as we could. It was interesting that when he gets out into the real world beyond the military base, the footage takes on a more ‘guerilla film’ type of look.
“In the interior of the house, I think the DP Barry Ackroyd must have been working under mixed lighting because the kitchen was very cyan and everything else, in the living area, was very warm. So we pulled some of the cyan out of the kitchen and made the living area look less warm and more natural.”
In general, Stephen tried to keep the look consistent across the movie. The exterior of the buildings, devoid of colour in so many places, meant they were always looking for colours in the shots – creating blue in the sky, pumping up colour in the uniforms that may not actually have been that green, the sides of beef at the market near the base. “I just kept looking at the photography and objects, trying to find something to bring the colour out of that may help tell the story better.”
Step one was to balance the shot, step two was going over each scene to see if there was something critical to latch colour onto to give the viewer more awareness and insight into the area they were in and, of course, into the feeling that Kathryn was trying to convey with that scene.
Barry Ackroyd mentioned that every day of the shoot in Jordan was brilliantly sunny, flooding every scene with light. But for Stephen that wasn’t such a bad thing. It gave him the bright look in the sand. “It was easier for me to enhance this existing look. I wasn’t trying to turn it into a warm, glowing place.”
Getting in Tune
Stephen has 20 years of experience as a colourist behind him, and still learns from every piece of film and every project he colour corrects. Every director also offers something to learn from. He is always drawing on his collective experience gathered over the years. As he looks through the scenes, at actors’ expressions, he can understand the feeling the director wants to convey without even hearing the soundtrack. Getting in tune with cinematography, the actors, and everything involved and trying to create a look for that scene, is what he does. By now, this process comes naturally to him.
After initially talking to directors, and discussing their overall message, they usually just let him go with the footage. “I make it look cool,” he said, “and if they want me to go back and change something, that’s OK. But sometimes they just want a different perspective. Some want the colourist to watch the dailies and match those, others just tell me what the movie is about and let me work through it myself. That last scenario is the way I worked with Kathryn, which she enjoyed. It was a smooth process.
Luminance
Stephen created luminance keys for the sky to add blue there, and chroma keys for the uniforms to pump chroma into those areas and to pump colours into the explosive wires. His work was done selectively shot by shot. During explosions he chose rocks, shrapnel and flames to pull chroma keys into, to draw viewers’ attention there. Some shots were simply better left devoid of colour.
“The slow motion shots with the Phantom needed a lot of chroma pumped into them to give them their look. This made some of the digital artefacting more visible, which required more digital cleanup of course. Pumping a lot of chroma into the suits, explosions and backgrounds does cause these artefacts to show up.”
|