
For the effects teams involved with the Harry Potter films, each new film has to shine a little brighter to keep dazzling the fans’ eyes. VFX artists at Cinesite, Rising Sun Pictures and Framestore talk about their work on the latest, penultimate Harry Potter movie.
 |
  |
|
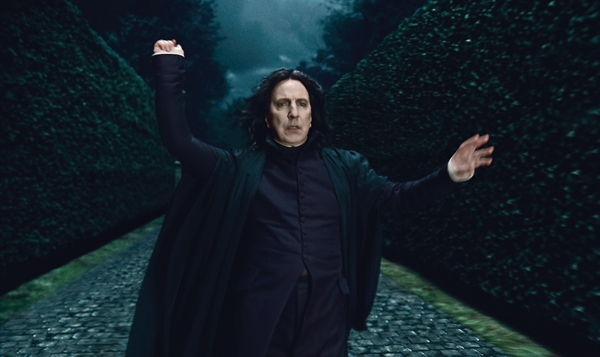
When getting started on the movie, each vendor’s brief required updating their own effects from a previous film, updating another vendor’s effects or, best of all, creating something totally new. But what was essential was not to change the looks of any single asset, creature or character enough to distance the audience from the story they love. As Sean Mathiesen from Rising Sun Pictures remarked, “Most of the Potter world is a familiar place to viewers, with a known visual language. A VFX team has to figure out how to make it instantly recognizable and look exactly as it did before - and then slightly adapt and improve on it to continue to impress a more sophisticated audience.” While artists want to take advantage of techniques and tools that may have improved since the previous film, the goal is not to change things but only make them better. Smoke and Cloth RSP had an interesting brief for their contributions to the opening sequence. For the first shot, the camera descends through clouds to reveal the title card by Double Negative and a helicopter shot over the forest but without either Malfoy Manor or, more significantly, a mysterious flying smoke-and-cloth creature, who comes and lands at the front door of the Manor. It was RSP’s job to add these as 3D CG elements. “We built the Manor house as a 3D model, tracked all the plates, converting them day to night, put the 3D building in, and did some Nuke projections, patches and matte paintings to enhance the environment and integrate the building. This part of the brief was pretty straightforward if not easy,” said Sean. Timed Blend This character is, of course, Severus Snape, revealed as a Death Eater in the previous film but with special characteristics. “We created an effect inspired by the Death Eaters, but unique and different because it was Snape. David Yates described it as a bat-like creature and we wondered for a long time if he meant it was actually supposed to be a bat -should we have a bat inside smoke? We did tests and tried to emulate Double Negative’s work on the Deatheaters.” They rigged a cyberscan of the actor to move in the same space on their plate as the character, and used this to generate the smoke passes. The cloth team then animated their cloth accordingly around the character. Thus, they had Houdini smoke effects passes moving up from the ground based on the match move character’s geometry, and the cloth simulation around that, while making sure they overlapped correctly in time. Sean said, “It was a timed blend, all arriving to coalesce in the character as he walks forward up to the Manor door.” Opportunity He started visualizing the idea in Cinema 4D. “I brought match moves, published geometry and digital doubles that we had created at RSP, into Cinema 4D to experiment with ideas on separating smoke, building it from the ground, then bringing in cloth to look at how cloth and robes would merge into the same character throughout the shot. I exported the tests using FBX. The Maya cloth team and 3D lead responsible for the Dementors’ robes established a set of falling natural, realistic robes using nCloth that would feel and would merge into the handover to the real character Snape. |
  |
   |
|
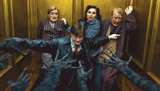
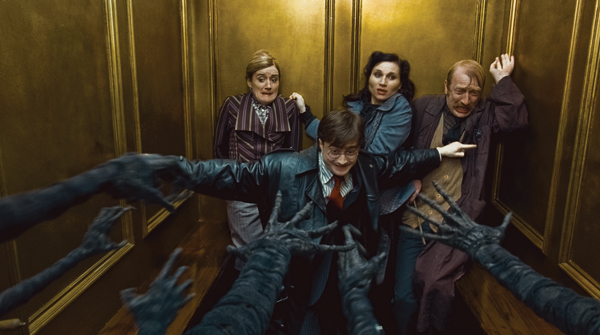
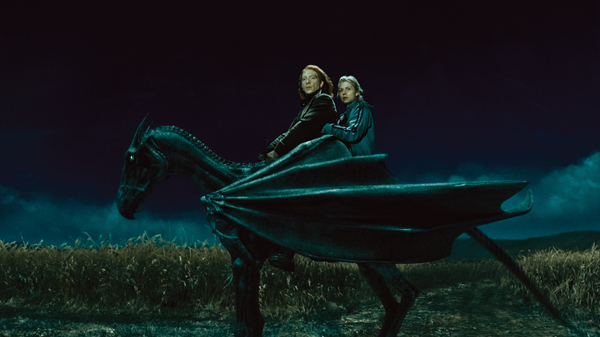
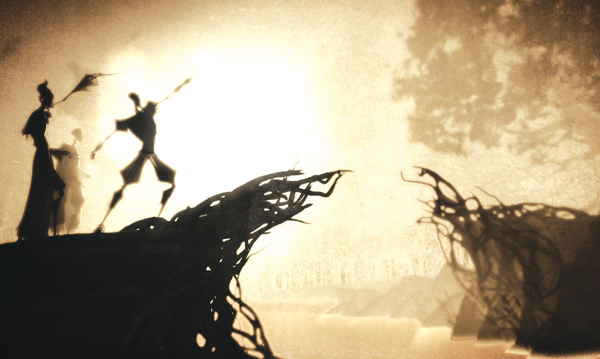
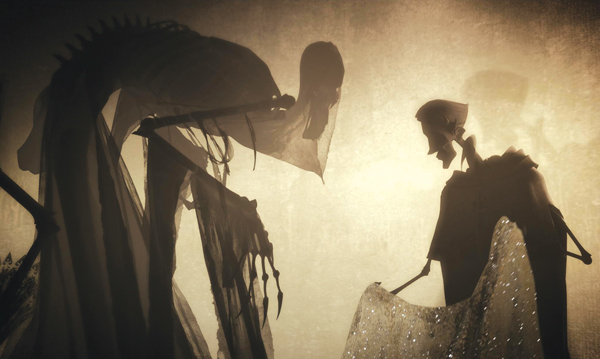
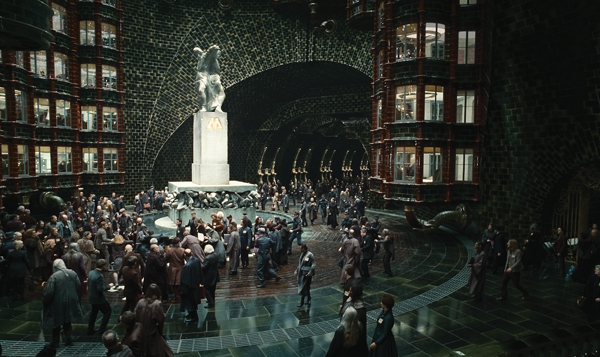
Fluid Drapery He wanted it to appear to be moving underwater, which meant developing its look in Maya nCloth to both resemble the look of past films and take on this new quality. “To make the Dementors as terrifying as they need to be, they must look like real characters, present and well integrated into the plate,” said Sean. “Our compositing techniques have improved since the previous film, shifting from a Shake to a Nuke pipeline and we wanted to take use this new capability. But it was important to keep the overall look the same.” They didn’t use any fluid software for the underwater look, focusing instead on the parameters in nCloth. They looked at early experimental videos of puppets draped in cloth shot underwater as reference for the Dementors, very helpful for achieving the elegant, scary look they wanted. Cavernous Interior “We would be handed a plate of the hero shot with an area of green screen where we needed to extend in the distance or add a required section. But as soon as it’s complete, you notice that it is empty of people. So as well as providing the plates, the production VFX crew shot elements of people on green screen for us, with appropriate lenses at the right distances.” Here, we’d put them into Nuke so we could track them with the cameras to fit the shot and integrate them. Lighting references were also supplied to recreate the scenes as on set, but the sets, built on a sound stage, only went so far, while the Art Department’s concept for shots may contain places ten times as large. Even without specific lighting detail for the extensions, just references as start points, it was still our job to make them look good Initiative While Sean was with the production in London, RSP’s Art Director Nick Pill worked up ideas on looks for the effect, researching and reading the Harry Potter books, and discussed different interpretations with Sean by telephone. The script provided little detail, so Nick presented lots of options, one of which Tim Burke and David Yates found had exactly the right tone – tortured, frightening, creepy, contorted and full of tension – but everyone agreed it had to be bigger, as much as 60 feet tall. Elegant Tempest Because this sequence takes place on the surface of a pond, they wanted to show that it escapes from the locket not only as a part of Voldemort’s soul but also of its surroundings, twigs and leaves, snow, slime, pond scum and algae – all resulting in an entity capable of terrifying and confounding Harry’s friend, Ron. Sequence Supervisor Dennis Jones worked with a team of Houdini artists to construct a CG event from the concept art with a sense of chaotic motion, able to project terror. Among many elements to incorporate into the effect, the team was given elements of Harry and Hermione as lovers, shot very late in production. When they arrived at RSP, integrating them into the rest of the Horcrux vision presented an unexpected challenge. While the elements up until then had been horrifying and violent, these lovers were insidious, slow moving and tranquil, preying on Ron’s fear of losing Hermione to his friend. They were to be seductive and elegant, but disgusting because of their slimy teachery – ultimately forcing Ron to doubt his own mind. |
   |
|
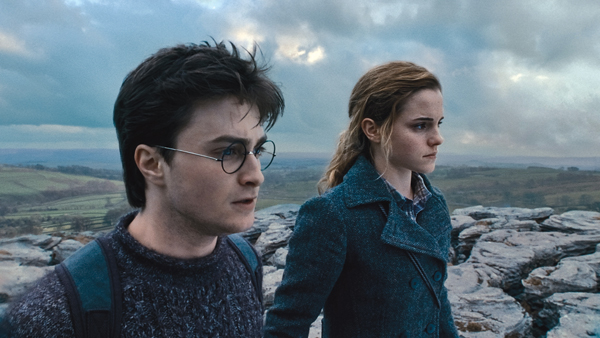
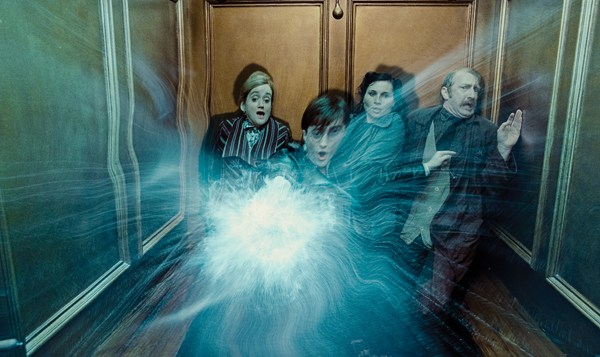
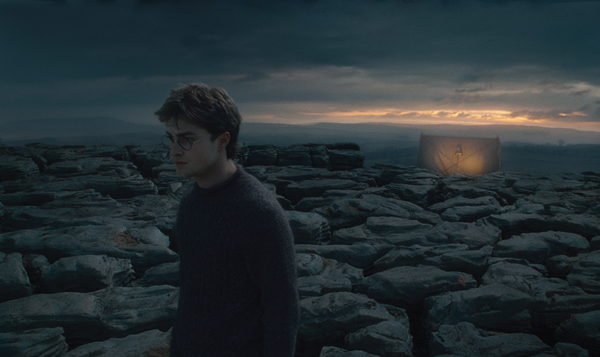
Perfect Balance From original design development to the last shot, one of the last they delivered on the film, the team spent roughly 16 months on the Horcrux to achieve the perfect balance of terror and attraction, while still maintaining the overall ‘Harry Potter’ tone and rating. It had been an exciting challenge for RSP’s team. Hot Pursuit RSP rotoscoped the characters off the plate and created the ball of light in Houdini with an explosive blast, attaching this to the end of Harry’s wand. Then they illuminated the elevator interior with a bright blue light and created sharp shadows from the roto outlines. A Houdini distortion pass warped the image to further the blast effect. Flushed Away Another one-off effect in which a character flushes himself down a toilet, turned out to require more trial and error than expected. They considered ideas from green fire to a full body collapsing into water. The director liked Sean’s idea of the actor spinning down into the loo, but rejected any kind of camera move. It had to be a locked off shot. So they began with the real actor on set who pulls a chain before a handover to a digi-double and a clean plate. “That let us spin the double as we needed, with deformations, using Houdini. Then we created the water spinning inside the loo,” said Sean. Malham Cove In one sequence, Harry and Hermione spend a few days at a ‘windswept hill’ location where the environment needed to resemble the distinctive cliffs at Malham Cove in Yorkshire, which feature a remarkable, natural limestone pavement terrain. Cinesite sent Andy, Holger and their photographer to spend five days up in Yorkshire gathering panoramas, textures and photogrammetric detail to almost completely reconstruct the set location to look like Malham Cove. In the main establishing helicopter shot approaching the hill, for example, they had to rebuild virtually the whole of the cliff. On location they captured enough reference photography and footage from the ground and from the helicopter, to be able to automatically rebuild the geometry and obtain projection cameras for the scene using Cinesite’s csPhotoMesh software, rapidly reconstructing the cliff. Rock Terrain When seated on the rocks giving a view out across the surface into the distance, the actors were shot on a set piece built to resemble the rock pavement, on a backlot at the studio. In these cases, Cinesite had to extend the rocky set and add a matte painting for the sky. Period Buildings For this, they needed to create three or four CG buildings from scratch based on the surrounding shots taken further away, and on texture photos taken at Lavenham in Suffolk, a village with similar period buildings. They also added CG snow, falling in the same swirling motion to match the snowfall in the sequence. While at Godric’s Hollow, Hermione builds a wreath with her wand for Harry’s parents’ grave. A practical wreath had been placed on set, but wasn’t exactly what the production wanted. It needed to appear brighter and more hopeful within the brooding, dark, blue-toned set, which made the wreath look gloomy. The team looked at images of wreaths shot in sunshine to get started on the look. Once approved, the next step was coordinating the creation of the wreath with Hermione’s circular wand movements. They used a simple L-system to start the ‘growth’ but adjusting the timing of the opening of the individual flowers turned into a manual keyframing task. They wanted to achieve a time-lapse appearance but make it appear to be driven by Hermione’s actions. A small rig was made for each flower. |
 |
|
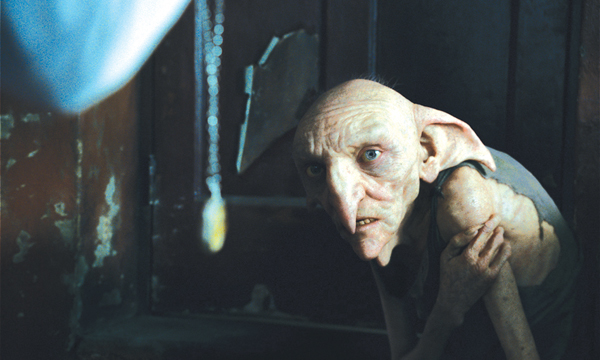
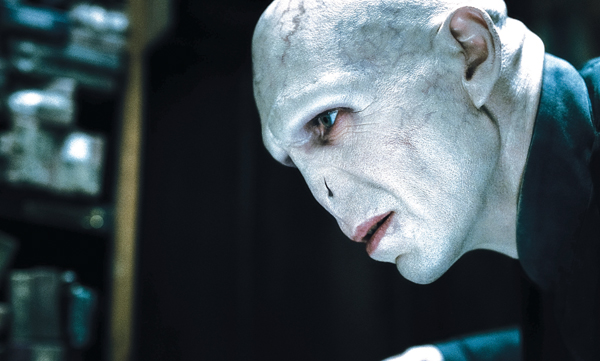
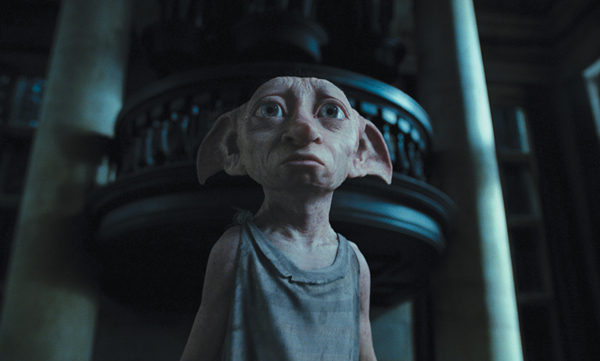
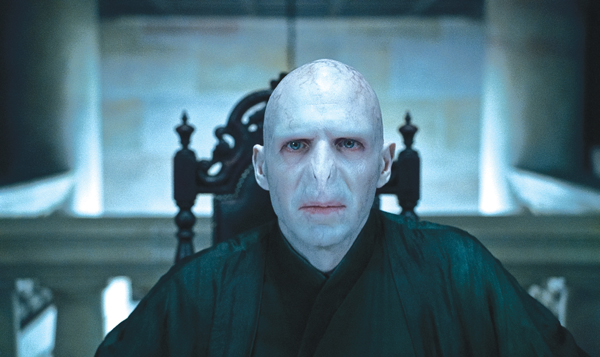
Snake’s Nose The starting point for each shot was the full CG head lit to match the plate. To introduce the CG nose, the compositors chose the best areas from either the CG head or the live action to use to hide the seams along the upper lip and natural creases of the face. The look of the effect had been developed originally at MPC, so the established design came from them, which Cinesite updated. The veins and other skin effects were achieved with make-up, enhanced digitally to create a coherent look across the composited head. The real nose of the actor, of course, obscured parts of the face depending on the camera angle. In low angled shots it might obscure his eye, for example, which would have to be cleaned up and repaired in the composite. Also, whenever the actor turned to the side, his nose had to be removed with clean-up and the missing background painted in. Facial Tracking The camera was tracked first and placed spatially correctly into the scene to be able to make best use of the lighting for each shot. For the head line up, they did an object track using 3DEqualiser. Then they made a 2D track of the markers on his face, projecting them onto the rigid head track to derive the facial movements. This work was handed to the soft track team to do the actual matchmoving of the performance, using a standard Maya animation rig. This way, one matchmover was doing the rigid head track as the basis of the lighting, scene set-up and rough blocking for the shots, and later they could decide on how complex and precise the actual facial matchmove and animation had to be to match his vocal performance and expressions. Once the full workflow was in place and streamlined, it worked well and they could complete the 46 shots of Voldemort’s face fairly rapidly. The major R&D done for the film was the updates made to the csSkinShader for this effect. From Dog to Doe It also became a source of light in the darkened forest scene. On set, a dog wearing an LED light-suit was shot walking along the path the doe needed to follow. This gave a good approximation of the correct interactive lighting shining onto the leaves and branches. The dog’s performance also gave them a base for blocking the animation. The director could choose the best part of the take for the action and the team would animate on top of that. The 3D team modelled the complete doe in Maya in full detail with references from production, who requested a graceful elegant doe. It included fur and a muscle rig just as if they were building a photo-real doe, to use as a start point for all CG work. To produce the required translucence, they then filled the doe with fluid and rendered it as a volume for the interior using another proprietary application csFluidShader. Caustics were rendered onto the surface and combined with the photo-real doe render in the composite to achieve the final look. Animating this model on top of the dog’s performance helped position the doe very accurately into the scene. The animators had a Lidar scan of the set so they could place the doe in space with proper contact points. Animation tests and approvals were done with the fully rendered creature to check exactly how it was working in the scene. The Patronus doe needed a long process of refinement and was one of the first effects they started on, working on it through to the end. Heroic Elf Throughout the dramatic sequence, the audience’s eyes focus on Dobby, which put pressure on the effects team. VFX Supervisor Christian Manz who led the artists over 16 months of work, said a major pre-production decision was that the two elves would be keyframe animated rather than performed through motion capture. This followed a proof-of-concept demo that Christian’s team, Lead Animator Pablo Grillo and CG Supervisor Andy Kind prepared for the director and Tim Burke in February 2009. Pablo Grillo pointed out that motion capture reveals every small hint or twitch of movement that may make viewers uneasy about the look of fantasy characters. Instead, the animators, working in Maya, developed human performances from appropriate references and staged the sequences to work within the edit and the elves’ design and character. An older staff member provided photographic reference of skin elasticity around the jowls, cheeks and eyes in specific poses under controlled lighting, to dial corresponding shapes into the rig. Tim also suggested filming the voice actors performing on-set as a further guide. Skin Deformer “We relied especially on a skin-like deformer that makes any surface relax or slide like skin over hard objects, but in real-time and without simulation. We broke the body down into anatomical regions, and used the deformer to refine structure, painting and animating the skin behaviour triggered by certain skeleton configurations. We have also refined a 'facial formula' for facial animation. With all these controls, we had facial shapes, deformer set-ups for eyes and lips, and the skin deformer taking all these inputs.” |
 |
|
Humanizing Christian said, “For the bodies we created clean base meshes over the original scan data using Topogun, so we could add subdivisions to the model for finer detail work in Mudbox, or reposing the model inside Maya. Delicate areas like eyes and mouth were designed for a range of facial expressions and to look more appealing, and we ensured our modelling work-flow would allow us to transfer large sets of blend shapes onto any model changes, at any point.” The Real Dobby CG Supervisor Andy Kind worked on lighting for the elves’ scenes, especially interior shots. He said, “We built on our recent skin shading technology, using multiple subsurface scattering techniques. To light scenes, we used mostly ‘bleed cards’ of HDRI textures from the set mapped onto simple geometry on cards. By scaling and positioning this geometry around the characters in Maya, based on the real lights on set, we controlled the intensity of the light and the softness of shadows.” Matching Textures Tim Burke shot a reference and clean plates, but the takes that David Yates chose were those of Harry interacting with the stunt double. To achieve the paintwork, they went to the studio to shoot texture reference of Harry’s wardrobe and hands to help rebuild parts of Harry that the double obscured by re-projecting and animating textures. Where CG and real skin and cloth textures are closely juxtaposed, shaders from a core library allow the artist to build up materials from the same components to preserve continuity of lighting, balanced in the composite. Out of This World “What was exciting about the apparation was that there is no real world event like it - the only way to visualize it was by using CG. We originally tried nCloth simulations for the deformations that the apparating characters undergo, but no matter how far the cloth parameters were set, they still resembled cloth too much. So we did further volumetric rendering along the incident vector to give the streaking and fluid movement a nebulous feel, with some cloudy noise to make the characters appear ephemeral. Illumination FX and motion blur were applied over the top of this.” |
  |
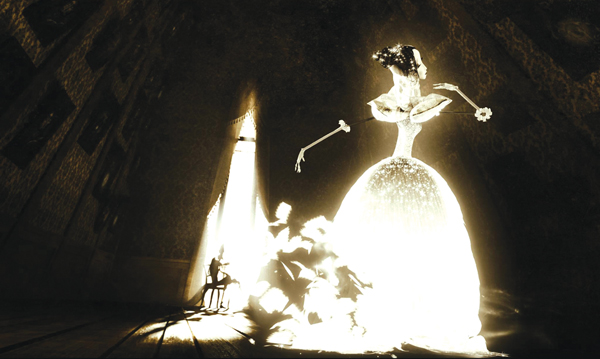
| Cool Cat The Patronus is one of the most intriguing, appealing and least defined effects in the Potter franchise. It represents a spirit-like animal protector, mainly against the Dementors, created by a magical charm. Their looks have progressed through the series, allowing the teams working on them to re-interpret and update them. Other examples have been energetic and spectacular, leaving swirling trails of light. But RSP’s Patronus cat was to be move very little and be calm but entertaining for several minutes. “We thought the qualities of dry ice would be appropriate, silvery, transparent, always changing and flowing down, unlike smoke. We experimented with lots of other looks, like solar flares, but these became too complex. “We settled on a simpler technique starting with a core or heart generating plasma impacting against the ‘skin’ of the cat, defining its shape, rendered in Maya and 3Delight with a Fresnel pass so you could define the edge but make the centre transparent to reveal the heart. At the edges was the dry ice effect, falling off to make it glow and feel larger than an ordinary cat. These effects were combined as different render passes, resulting in our cat.” |
 |
| Dumbledore’s Ghost The ghost of Dumbledore was a brief but critical effect in the story. The task began with a clean plate of the corridor in which the ghost materialises, and the actor shot on green screen as a separate element. They built a simple digi-double for him, preparing to project his performance onto this, and then placed him in a spatially correct position into the corridor. That gave a starting point for the particle simulation. Because the director didn’t want to see him fully resolved throughout the four shots, they started animating patches of his texture that grow over the body of the digi-double and were used to emit and attract Maya particles of the correct colour and position, rendered in RenderMan. The ghost remains obscured and mysterious up until the moment he extends his hand and becomes recognisable as Dumbledore. The corridor was actually re-built in CG, based on the clean plate which had been lit and shot as it should appear. They could derive their lighting from this and use the recreated geometry to cast shadows and control the interactions with dust and particles against the walls and picture frames. |
| Words: Adriene Hurst Images: Courtesy of Warner Bros Pictures |
| Featured in Digital Media World. Subscribe to the print edition of the magazine and receive the full story with all the images delivered to you.Only$79 per year. PDF version only $29 per yearsubscribe |


