
Framestore’s VFX team ventures into space with new techniques for lighting, virtual cinema and photo-real CG.
GRAVITY - Every Way is Up |
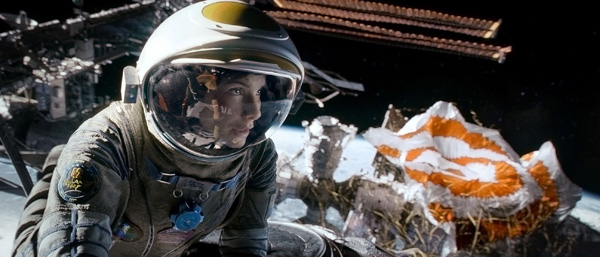
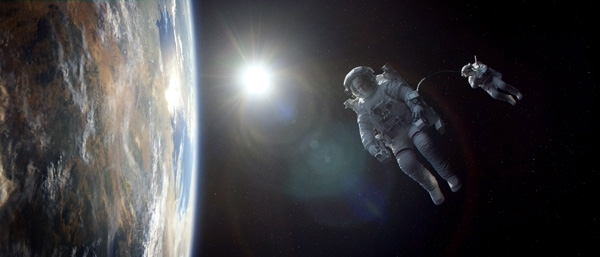
| A primary challenge of making ‘Gravity’ was the director Alfonso Cuarón’s intention to tell an action story about human characters that takes place in a weightless environment. He also wanted to avoid any looks or scenes in the movie that resembled science fiction or fantasy, intending from the start to create an illusion that the cameras had literally been taken into space. |
 |
|
Integrated ProductionIt was a challenging plan with many details to tackle, especially since the weightless environment and need for extreme realism would limit the VFX team’s options for real world reference. But Tim believed that computer graphics was the only way Alfonso could take his cameras into space - as virtual cameras in a CG space environment. It was also the only way the characters could realistically exist in this environment - in this case as perfectly accurate, CG animated space suits with live action heads composited into the helmets. Most important, from pre-production through production and into post, Alfonso and the DP Emmanuel Chivo Lubezki would need to develop their ideas and work together continuously with Tim Webber and the team from Framestore. Every decision one of them made, affected the others’ work even more than on a typical effects-driven project. |
 |
|
During preproduction, a huge amount of effort went into previs, which took about nine months to complete. Most aspects of the project were mapped out digitally, including shooting angles, asset design, the lighting, as well as the action. Tim said that because so many shots and sequences would depend on CG animations, everyone was keen that all shots were worked out in advance in detail to know how sets, assets and characters would move and work together. It was essential that the CG-animated portions look completely photo-real to the point of feeling like real life. Keyframing was to be the main technique for both character and camera animation. Virtual DirectingAlfonso also had a 3D camera to use on screen, inside a virtual set, to compose his shots and plot the action. Due to his preference for very long shots with slow subtle camera moves, his shooting style was an important influence on the decisions Framestore’s team made. It demanded a high level of detail, accuracy and realism in the CG modelling, texturing and consistency of lighting across all shots of any sequence. |
 |
|
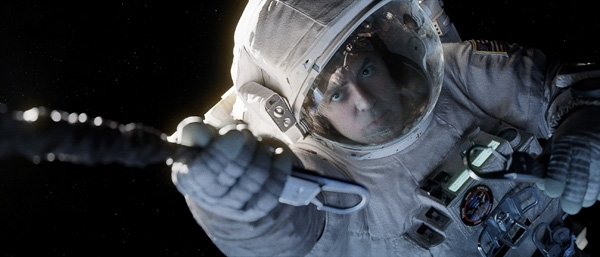
‘Gravity’ was, in fact, the DP Emmanuel Lubezki’s first chance to work with virtual photography and he found the extensive use of CG let them take the long, continuous shots to the extreme. For example, they could move from an objective wide view to an extreme close-up of the lead character Ryan’s face in a single shot, which he felt gave the audience a better understanding of the character’s experience. CG sequence supervisor Stuart Penn said, “This virtual camera work was done before the shoot at Shepperton Studios as previs on Framestore’s motion capture stage. Alfonso worked out the moves, sometimes quite complex, that he wanted to tell the story and it was up to us to work out how to shoot it, choosing techniques and rigs that could handle those moves and give him as much flexibility as possible. At the same time, it provided the animators with framing reference and was played back on set as a constant reference for the shoot.” |
Extreme Light ControlBecause Lubezki and Tim both understood during previs how complicated the lighting would be and how much it would affect the photo-real quality of the shots, they worked together to determine digitally exactly how the lights would affect the faces of the characters. They realised they would have to be able to match this effect on set in order to composite the live action and animation perfectly. This way of thinking runs in reverse to the usual CG workflow, where the artists typically try in post to match their work to the live action. Needing lights that could move fast and change colours in an instant, Lubezki thought of adapting real-world techniques used in LED light effects and projections. He and Tim began testing different lights, in which the main issues were inconsistencies such as flicker and colour hue aberrations. Tim applied his knowledge of CG lighting to develop a physical system - a light box lined with highly controllable lights, large enough to hold a performing actor - that could both function on set and produce results that Framestore’s team could work with in post. |
 |
|
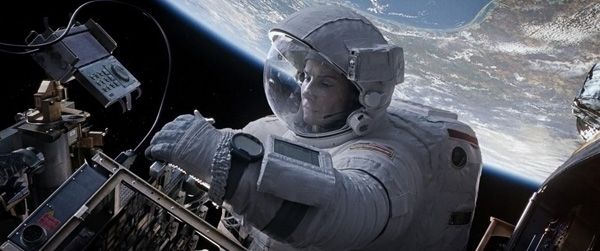
Tim said the panels and LEDs worked like the pixels on a computer monitor and allowed them to make lighting adjustments in a way that would otherwise be physically impossible. He said, “It enabled us to add interesting, realistic complexity to the lighting, with subtle variations to both colour and texture.” Art, Science & Drama of LightFurthermore, images depicting scenes from the story could be projected onto the walls, such as planet Earth or the starfield, or the International Space Station [ISS] itself. While this was mainly done to help Tim and Lubezki reflect the correct lighting onto the characters, it also let the actors see the view that their characters were meant to see as they performed their roles. The primary light sources for most sequences are either the sun or moon functioning as hard lights, with the Earth acting as a softer bounce card. CG supervisor Theo Groeneboom said, “Getting the balance right was a tricky combination of science and art to make sure we could operate the lights predictably in a way that the crew and, most important, the DP could understand. First, we measured the response curve of the LEDs via the camera to create a function that let us transfer values from arbitrary computer-values to light stops and colour temperatures. |
 |
|
The Light Box was a great innovation for the production, and reinforced the collusion of the VFX team, the director and the on-set crew including the DP, camera crew and special effects team. However, the tight space inside made the logistics of the actual camera work fairly challenging. The camera had to be small and maneuverable enough to capture the shots they wanted but still record accurate and consistent images. Robot DPThe production used automobile manufacturing robots hired fromBot & Dolly, an industrial automation specialist in California. A custom-built motion-controlled camera head was attached to a robotic arm via a 3-axis remote head, and the crew could use this to position and control the camera inside the light box by computer. By programming their camera moves into the computer, the camera could be manipulated quite precisely for pan, tilt and roll, working at variable speeds. Alfonso’s virtual camera data was not passed directly to the robots. Instead, Framestore's tech-vis team took the cameras from Alfonso’s previs animation, restaged and made them work within the parameters of the robot. Bot & Dolly provided some tools and the specifications of the robot, which the team used to visualise the limits of the robots’ behaviour within Maya. |
 |
|
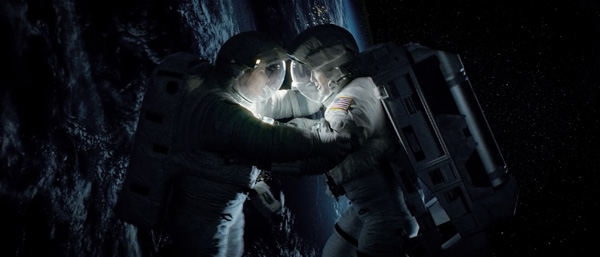
Before each shot, the actors, Alfonso and Tim Webber would talk through the previs so they knew what was required. “We would talk about how far they could depart from it - for instance, if their dialogue was running long - and what specific beats we really needed them to hit,” he said. “They were terrific at taking this on board, always hitting a physical mark when they had to, in spite of being strapped into a rig with the lights whirling around them. It really shows in the results. Rigged for Action”Then we would rehearse several times at half-speed so they could build up the muscle memory of the key physical positions we needed them to achieve in the shot. When they had it down, we could simply focus on the performance Alfonso wanted. To help make sure our eye-lines were always correct, we would put a red dot on the walls of the Light Box to give them something to follow. Sometimes when Ryan was going to be very close to the ISS or inside it we would render the whole interior and play that back for lighting, also providing Sandra with objects to look at and follow as they moved around her.” |
 |
|
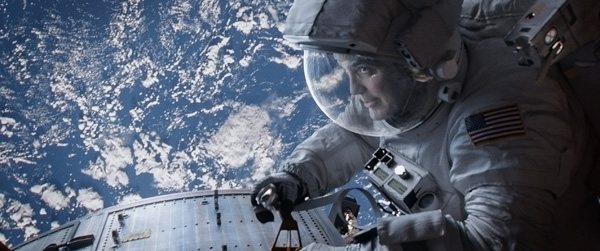
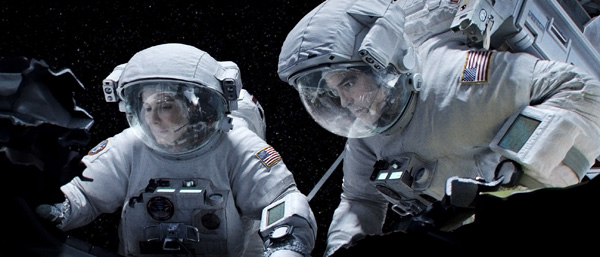
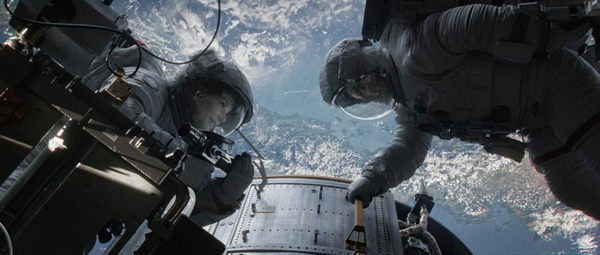
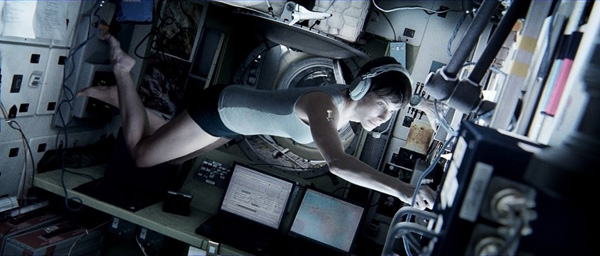
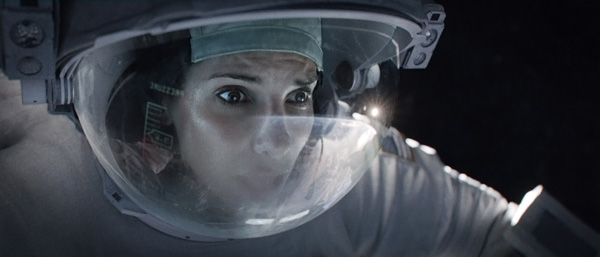
The main criteria for rigging in ‘Gravity’, unlike most films in which rigs need to support actors as their characters fly, fall or leap, was that it could support the appearance of weightlessness that was a major factor in the story. Therefore, regular wire rigs and harnesses would not have been successful because the actor’s body usually appears to be hanging from them, instead of floating. Nevertheless, the production did use some very unconventional wire rigging, created by special effects supervisor Neil Corbould. This was a 12-wire system, operated by an overhead pulley system attached to a very thin, light harness the actress could wear under her outfit as she floats about the passages of the ISS. Space Suit DynamicsThe description above outlines what the actors were doing on set. But in fact a large portion of the character action is portrayed through computer animations. Whenever we see them in their space suits, we are seeing either CG space suits with live action heads composited into the helmets, or completely CG characters. The production decided on this method because of the bulky restrictive design of the NASA space suits. |
 |
|
“A physical costume was created of Matt Kowalski's EVA suit, used to show us the range of motion reference, that is, how mobile an actor could be when wearing it. Physical helmets that would be worn on set for tracking were designed and created as well. To make sure our CG helmets matched these absolutely precisely, we used photogrammetry to capture them as 3D scans.” When animating the suits, the animators had to take the drama and story into consideration as well as realism. “We certainly tried to respect the limitations of a real space suit. We studied a lot of NASA reference and used our own performance reference wearing the art department’s space suits but, particularly in the action moments, the motion needed to be very dynamic and violent and we had to push the animation beyond reality,” animation supervisor Max Solomon said. |
 |
|
 |
|
Mark Bakowski said, “We spent a lot of time building templates for all components of the composites - the visors, the lens FX, depth of field, everything. We updated these regularly and continuously talked about them so that in the end, they were largely logical and easy to dial in. Also, Tim Webber knew how our templates worked, so we could speak a common feedback language that, I think, was what made these composites possible despite the complexity of the workflows and the shot length. “When the crunch was on for any specific sequence, we threw a lot of people at it but always under the control of a main compositor who knew it best and ran it. For example, one team ran the Earth in the background and another dimensionalised the faces, but it was all pulled together at the end by one person.” Lighting Up with ArnoldDuring the production the team developed their own in-house physically plausible shading system, using the Arnoldrenderer for the first time. They made this decision mainly because the old system could not cope with the amount of data needed to sustain the level of detail necessary in their assets and could not consistently match the lighting interaction visible in reality. Arnold is a purely brute force ray tracer allowing use of huge amounts of data to calculate multiple surface light interactions consistently. |
 |
|
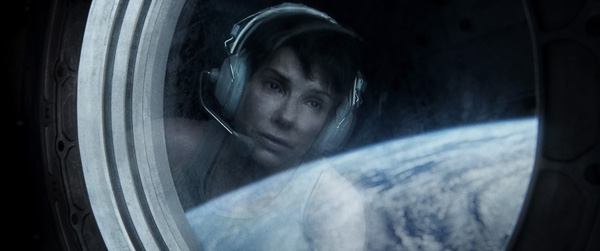
Adopting Arnold resulted in detail and light interactions that were more accurate than any they had used before. Lighting was more intuitive, and their approach to solving lighting challenges had a direct comparison to solutions used on set rather than the previous more abstract technical solutions. For example, if Lubezki added a bounce card on set, Framestore added a bounce card in their scene, producing a direct match. This allowed a common dialogue between the technical directors, VFX supervisors, the director and the DP. Furthermore, once look development was complete, the artists were confident that the asset would look photoreal in all lighting situations from all directions without per shot alterations. However, because rendering with this level of detail and lighting accuracy is computationally so demanding, they had to put considerably more effort into render optimization and quality controlling the lighting to avoid wasted shot iterations. In fact, most shots on Gravity would only be rendered once at full production settings. Floating RyanThe lighting from the CG projections in the Light Box and the live action proxy ISS sets only took the lighting process so far. As the environments shot around Sandra were simple versions of what would be visible in the final film, simply replacing them would have meant that she wouldn't sit believably into the new, fully populated environments. The compositors solved the problem in post with a two-step process that was very useful for the complex sequence following Ryan as she enters the damaged ISS, removes her suit and travels down along the corridor. |
 |
|
“Because the shots were so long and Ryan moves through many different lighting scenarios, this was a lengthy process. The close body track of Sandra's movements also allowed us to cast shadows from her CG double onto the environment as she passed through the CG sets and also reflect it on shiny surfaces,” said compositing supervisor Anthony Smith. “The technique worked particularly well for the moments where she directly interacts with a part of the environment, such as holding a handle or pushing off a wall. Plate Joins“In the second step, the compositors used mattes generated from 3D position renders defining the 3D location of any point on the visible surfaces of a 3D rendered image, to selectively colour correct parts of the interiors and enhance the feel of the environments once lighting was complete. We also selectively and very subtly graded the plate elements to further help them feel part of the environment. For example when Ryan moves her arm in front of her face in the airlock, we cast a shadow onto her face because she had not made this movement on set.” |
 |
|
Anthony said, “In the airlock we heavily accentuated the breath elements on the visor - actually my own breaths blown onto a cold pane of glass, and captured on a DSLR camera in the Framestore capture studio. In the composite, these elements were timed to match Sandra's breathing, mapped onto the geometry of the visor and used to heavily diffuse the light that passes through them. During this part of the shot, we graded Ryan's face to look quite pallid, animating the grade away once the helmet is removed. Warp and Flex“Once the suit is removed extensive work was done on top of the existing animation of Ryan's float to make sure that her centre of gravity appears to shift as her pose changes while maintaining the feeling that between each interaction with the airlock, her float is completely linear. Some of her body parts were replaced with CG, such as her arms as she pulls off the suit, and her torso was warped to simulate the struggle to remove it.” Throughout this shot, the overall hue slowly changes, beginning with a cold blue as she enters with no oxygen left in her suit, and ending with a calming warm hue as she curls up into the foetal position and warm light bounces off her skin and around the airlock. Although the grade was added in the composite, using the plate to heavily influence the lighting of the airlock helps the viewer believe that they were shot together. |
|
|
|
Fiery TransitionDuring the fire sequence, many of the labour intensive techniques described above were used - warps, morphs, patching and reanimating Ryan's limbs and her location through the environment. Using elements from a fire element shoot for the CG walls and to augment explosions, layouts of fire were completed during an initial compositing stage and passed back to lighting to allow the fire textures to light the environment. “Unlike the airlock and first ISS interior shot, the fire sequence ends by transitioning into a fully live action plate as Ryan enters the module connecting to the Soyuz capsule, but the sense of connection with the CG environment was held for as long as possible by adding a few 2D flames licking through the gap in the door as Ryan closes it,” Anthony said. “The shot was finished with smoke, glows, embers and heat haze from the flames, built using animated distortion planes in 3D space in the composite, rendered and used to distort the final image before the lens effects and grain were applied. “All of the shots had the plate elements of Ryan converted for stereo - much more involved than the faces in helmets and requiring a lot of roto and clean up work. A convolution filter was applied to every frame to allow areas to bloom and glow realistically and chromatic lens aberration added. Having previously removed all of the digital noise from the source footage, we also added film grain to the final composites to give a cohesive look of a sequence that was originally shot on film.” |
 |
|
 |
|
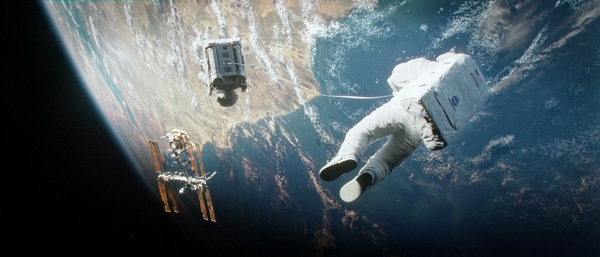
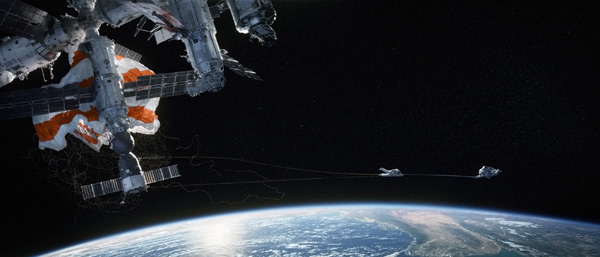
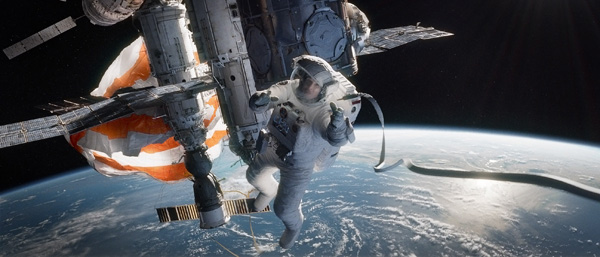
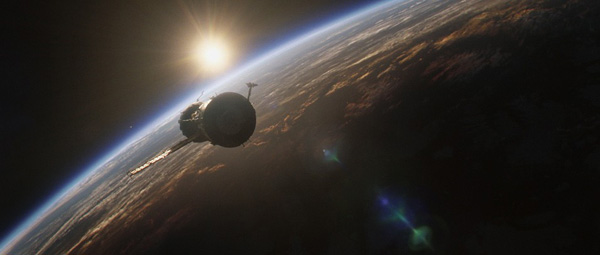
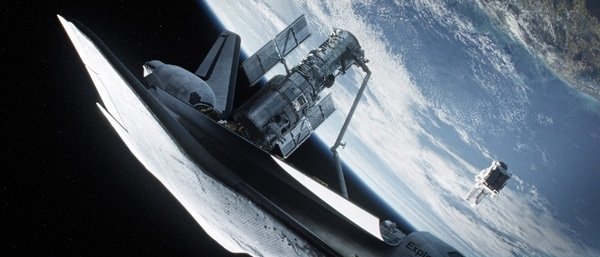
The sunset-sunrise schedule also wasn’t arbitrary – it was all planned out with the rhythm of the story to make sure we were hitting the right intervals between setting and rising. They needed to show the changes in the amount of light that would be reflected from the surfaces at different times and from different spots. “The path takes us around the earth pretty fast,” Stuart Penn noted. “We knew the key spots we wanted to see and where we had to start, so it all started to fall into place. Alfonso wanted to start over Mexico and that brought us over the United States. Then we see the UK as we come over Europe and then it starts to go to night, and it all begins to work. We shifted the angles slightly to get us moving over India, then down over Malaysia and Singapore and then we come up the Chinese coast then over the arctic. In the portions of the film that feel like a break or gap, during the dream sequence for example, as she’s not quite sure how long she’s been asleep, we could change position slightly.” Space TravelThe interior and exterior design, textures, details, design and animation of the ISS, Hubble and other spacecraft were all based on the abundant information that NASA has made available to the public. The virtual set design and build was another area on which production worked very closely alongside the VFX team, in this case with the production designer Andy Nicholson and his team. Nearly all of the sets, including important parts of the ISS interior, are computer generated. Andy said that in spite of his experience in working with visual effects supervisors on set extension and CG backgrounds, the fact that entire sets, including all props and backgrounds, had to be designed, built and rendered to a high level of photo-realism completely changed the nature of the project. |
 |
|
During previs, they began setting out the environments, getting the director’s approval as they worked. The artists would rely on the facts as far possible and then adapt the set if necessary to suit the action and story. Nevertheless, because their work formed the basis of the digital build at Framestore, the designers found designing assets that would never be built physically quite difficult. The sets were populated with hundreds of props, all of which had to be researched, designed and then modelled. These items were compiled and organised into a library of 300 or so props that could be used for set dressing inside the two space stations. Artists could interactively place props and then store them to a call list that would be used at render time. Some props such as cables, tubes and wires had posable rigs, others had multiple look variants that were switched between. The texturing was even more important than usual to give a realistic finish to all assets and was enhanced with heavily layered detail. An interesting characteristic was wear and tear, and other signs showing that the Space Station has been lived in by different people for about 12 years, so some textures were applied to the designs which Framestore’s texture artists would develop to coordinate with the proximity and moves of the camera. |
 |
|