

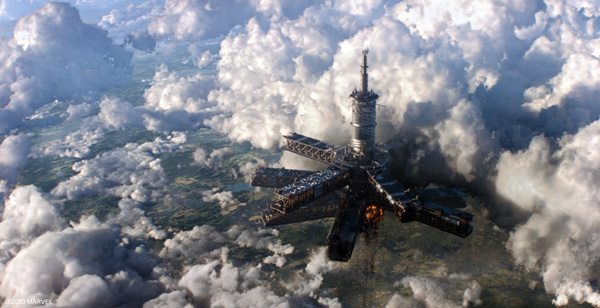
In ‘Black Widow’, Natasha Romanoff’s backstory is finally revealed to fans, including the time she spent in the Red Room, a training ground for assassins that she thought had been destroyed. After she discovers that it is still active, airborne and concealed in the clouds, the Red Room makes a spectacular appearance in the film.
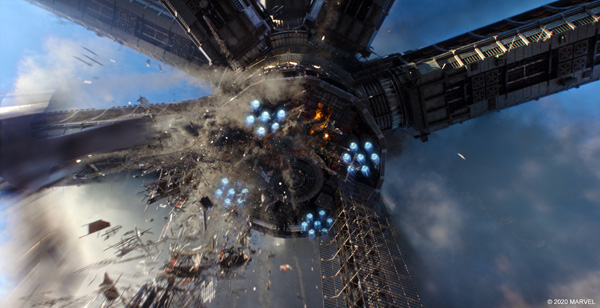
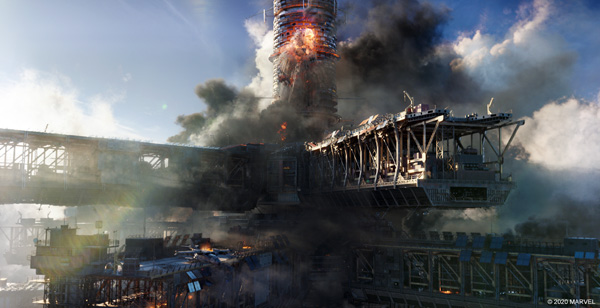
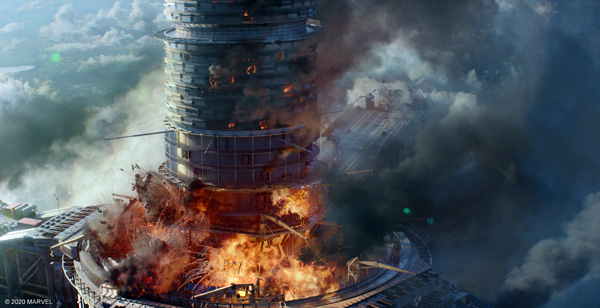
Working with Marvel Studios and their visual development group, Digital Domain created the Red Room entirely in CG for a dramatic aerial sequence that ends with its destruction. The structure is massive and was designed to look functional but intimidating, reminiscent of Soviet-era architecture. It features airstrips, walkways, a central tower and several engines that keep the structure in the air, all of which Digital Domain created digitally.
They also visualised the surrounding sky environment with individual clouds, highly customised lighting effects and the countryside below. To complete their sequence, all of these elements were set in motion and then torn apart, using both simulation effects and animation, focussing on realism and consistency. Digital Domain completed roughly 320 shots for the movie, dividing the work between their Los Angeles, Vancouver and Montreal offices. See their VFX breakdown video here.
Red Room Team
CG Supervisor Ryan Duhaime and FX Supervisor Eddie Smith both worked on the Red Room team, and talked to Digital Media World about the project. “We began work on ‘Black Widow’ about two years ago. Asset development started about six months before plates started arriving, when we also created pre-vis for our main sequence,” Ryan said.
“The striking camera angles were taken directly from plates captured on set, either as cues for their all-CG shots, or literally for the composited plates. The edit stayed fluid for some time at first, keeping us busy trying to keep up. The team also helped to supervise re-shoots or create effective post-vis to develop the look and timing the production wanted for the VFX before committing to them.”
Communicating the scale of the Red Room to the audience was important when building the asset. “Using a Soviet radio tower as a basic reference for the look, the rigging and animation departments created an overall layout. Each of its multiple arms was four or five stories high,” said Ryan. “The artists decided on the materials from the concept art, choosing the metals and glass. Marvel liked the look of the square tiled windows seen in the images here, and therefore these were used as a size reference for the other features.”
Collapse and Descent
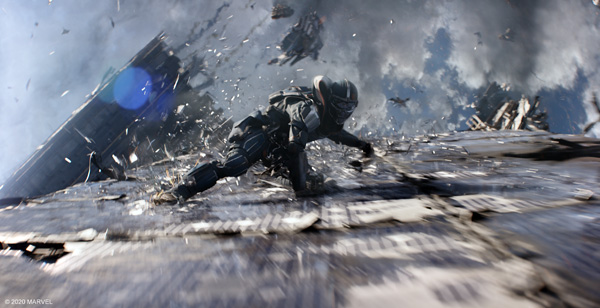
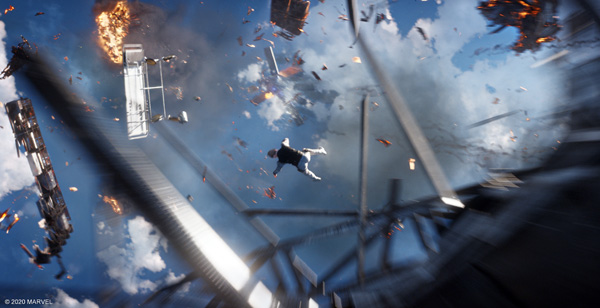
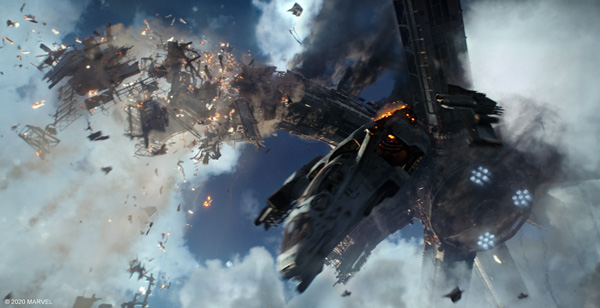
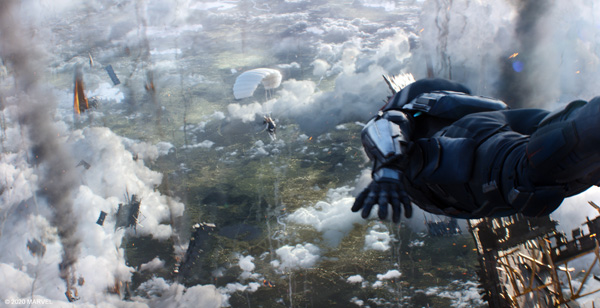
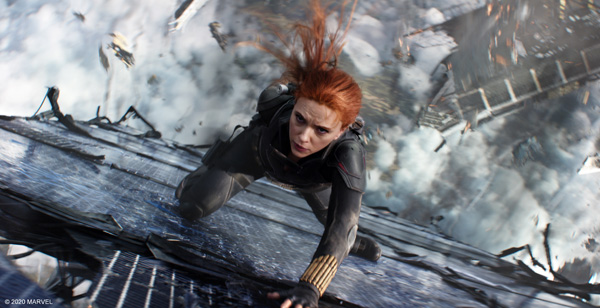
In the story, the Red Room collapses in a series of explosions, forcing Black Widow and her allies to escape via jet, parachute and, finally, freefall. On their way down, the sky around them is littered with enemy soldiers, cloud, embers and debris ranging from small scrap to large sections of buildings. Moment by moment, each shot features dozens of pieces of wreckage.
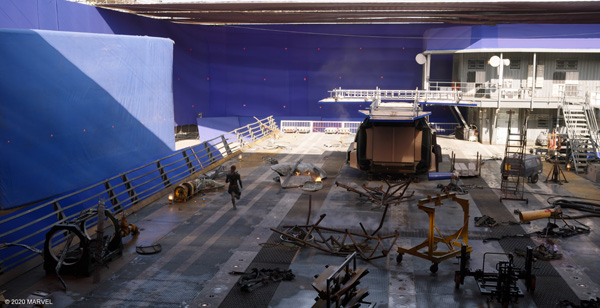
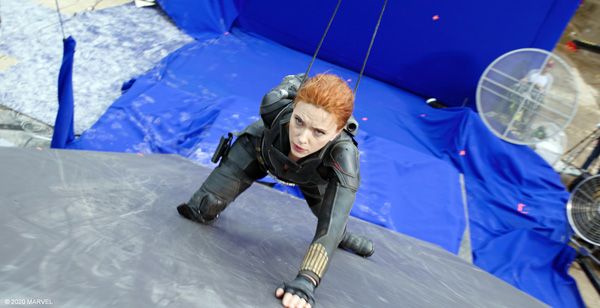
To capture the live-action parts of the descent, the production had shot the main talent on wires and mechanical arms against bluescreen, recording some held aloft in an indoor vertical wind tunnel, and filmed stunt actors performing the riskier manoeuvres while skydiving. The footage was then sent to Digital Domain, where artists created a layout that tracked over time where the characters and the major pieces of debris were going to be in any shot.
Digital Domain’s pipeline is based on Maya for modelling and Houdini for FX, using Houdini’s Bullet Solver, a rigid body solver that is set up with constraints. Constraint geometry is used to set up dynamic constraint relationships between simulated pieces. These can be created when fracturing the geometry.
“The debris was generated from Houdini and driven by animation in Maya. Blocking out the timing and the animation first in our layout was a critical step to give the sequence continuity. In the end we had over 1,000 models to keep track of, which included damaged and undamaged versions, managed in an internal administration system,” Eddie said.
Into the Sunset
With the general layout set, the team determined how the scene would evolve under different lighting and environmental conditions. The aerial footage had been shot over an area in the UK. To help recreate the flight in their CG work, along with the video, they were given aerial photogrammetry data and the altitude.
The scene takes place as the sun begins to set, the traditional photographer’s golden hour. When the sun is low above the horizon, rays of sunlight have to penetrate the atmosphere over a longer distance. The intensity of the direct light is reduced, limiting contrast by lowering the lighting ratio. A kind of diffusion, its effect scatters more of the blue light, so that light from the sun has a redder look and makes the Red Room look strangely beautiful. At the same time, the low angled light produces longer shadows.
Cloud looks in particular were affected by the lighting – showing that pre-sunset look at the top of the cloud, then the changes occurring as they fall through the cloud, to the sunset underneath. The team would publish these looks for the client, but also for FX to render the cloud because they needed to see the direction of the light – sunlight, ambient light and HDR.
Complex Rendering
To create the destruction and hard surfaces, while also rendering the scene quickly enough to allow for changes, GPU rendering was used in tandem with CPU rendering -- scaling up the rendering for complex assets and volumetrics is not straightforward. Digital Domain’s VFX supervisor on the movie Dave Hodgins said, “Rendering one cloud is easy, but rendering 100 clouds – along with dozens of big and small pieces of debris – is a challenge. GPU rendering allowed us to do more in a shorter period of time, and led to further developing a new technique that also opens up new possibilities for us going forward.”
Balancing the load across a combination of CPU and GPU rendering was a method they had tested successfully earlier on for their work on the movie ‘Captain Marvel’ and the character Thanos in ‘Avengers: Endgame’. It is still a relatively new technique for achieving photorealistic effects on a large scale – partly due to the heavy demands it places on the hardware.
“Redshift was used for hard surfaces as it is a very fast-working GPU renderer, especially with instanced models. The texturing department had their texture maps sorted so that they could plug in the shader and render everything in the same way for Houdini as for Maya, writing Redshift proxies,” said Ryan. Groups of objects and lights can be exported to Redshift proxy files, which can be referenced by other scenes and allow shader overrides for particular attributes, as required. On the other hand, the character doubles that needed to be created for shots, involving hair and cloth, were rendered in V-Ray on the CPU.
Defined by Motion
In the widest sense, this sequence and scene are defined by the motion of the elements, such as how the characters’ interactions would affect the falling debris, when clouds should be added and removed to reflect momentum, the rate at which the lighting should change to reflect the setting sun and the look of shattering wreckage as the pieces collide and interact with the light.
Ryan said, “Scale, speed and camera motion affected everything including the choices we made early on about the construction of the Red Room. Massive pieces needed to move more slowly in order to really look massive, for example, as the embers whip past, and the camera tracking affected how fast objects appear to be moving.”
Artists went through the work shot-by-shot to maintain continuity, digitally altering each key asset and environment by hand. The job was hugely time-consuming, requiring several iterations, but having the layout anchored meant they could focus on looks and the destruction effects.
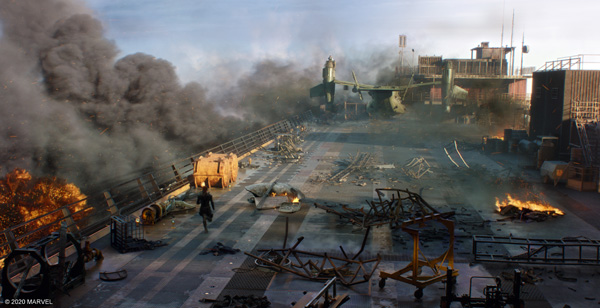
Once the main characters actually make it to the ground, the debris had to follow. The production used a combination of practical effects, including physical props dropped on the stage, and in post, bluescreen content was used to introduce some of the larger wreckage. Having tracked the falling debris, the artists altered it to show damage caused by the impact, altering each piece as needed. The remains of the smoking, fiery structure crashed into a nearby forest while the main characters are left standing in a field of real and CG debris. www.digitaldomain.com


