
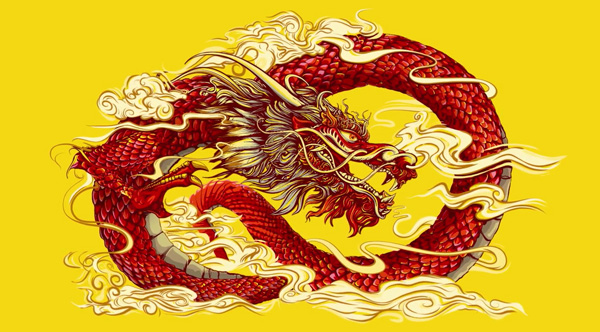
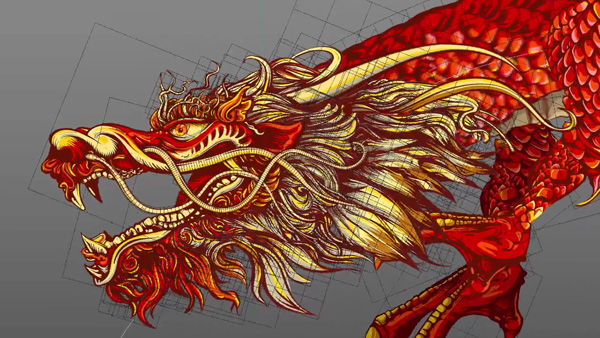
Adobe Creative Cloud was launched in China for the first time in late 2016. Motion artists at two studios in Sydney, Never Sit Still and Luxx, collaborated on a special project for the event, and were tasked with bringing to life a highly detailed illustration of a Chinese dragon created by Brian Yap.
The two teams were originally briefed to create a short 5-second sting based on the Dragon, and the same short sting was to be used to introduce the names of the nine speakers who would be talking on the day. Mike Tosetto from Never Sit Still spoke to Digital Media World about the project, saying that early on the brief changed and they were asked to create one 20-second animation of the Dragon instead. This would be used for the big moment when the CEO of Adobe announced that Adobe Creative Cloud would be available in China for the first time.
The final animated illustration that was played at the event can be viewed below.
Authentic Artwork
Because maintaining the authenticity of the original artwork was essential, turning this extremely detailed, static illustration into a 20 second animation became a challenge. They needed to fly the dragon around their scene to tell a short story. As they started to think about all the individual components such as the dragon's body, claws, head, hair and whiskers, along with all the clouds in the scene, they decided on the tools they would need to create this project.

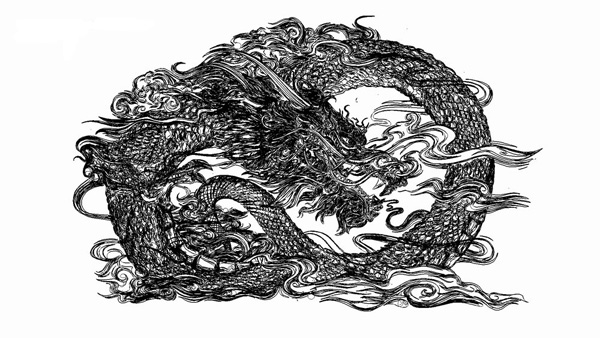
First, the enormous amount of detail in the Brian’s illustration made it nearly impossible to work with as a vector file. It was flattened to an 8K bitmap image to transfer over to Photoshop, where it was rasterised and separated into all of its elements and retouched where necessary. They also took the trouble of deep etching each piece of hair and the whiskers, knowing how much life the hair would give the piece if it could move independently of the dragon.
From this point they imported the different parts of the dragon into MAXON Cinema 4D for rigging and animation. “We started with the body as this was one of the trickier elements due to the circular shape, especially because we were dealing with a static illustration that was bent so far in one direction. We needed to find a way to straighten it out first and rig the body so we would have full control and could make it move and bend in any direction we required during the animation process," Mike said.
Polygons and Splines
“Our initial approach was to cut the body into several pieces, then use a Cloner Object to distribute the different pieces along a Spline. This idea worked well in theory, although the edges never lined up perfectly, and they also looked too jagged. It was crucial that the dragon look almost identical to the illustration so we needed to find an alternative.
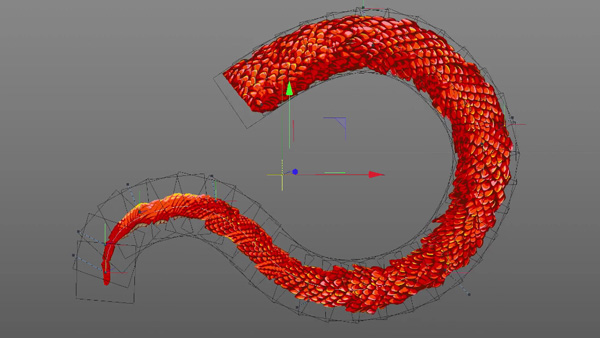
“Our next idea was to use the Puppet tool in Photoshop to straighten out the body, then map the straightened body onto a polygon with a high edge count and use a Spline Wrap to allow the body to bend in any direction. When you create a polygon in Cinema 4D, it's basically just a flat plane, with no segments. We needed a very long polygon with lots of segments, or edges, on a single axis, allowing it to bend and twist. A low edge count wouldn't have allowed it to move so freely and it would have appeared jagged. We then mapped the Dragon's body artwork onto the polygon.”
The Spline Wrap was simply a Deformer that could be placed as a child of the polygon mentioned above. Then they were able to attach the polygon to a Spline, via the Spline Wrap Deformer. Then they animated the spline, which in turn animated the polygon. This approach worked well and the new version rendered with a look much closer to the original illustration than the first attempt.
Constraining Vertices with Xpresso
The rig allowed full control when animating the Spline, built using a neat Xpresso script that constrained the vertices of the Spline to Null Objects. By keyframing the position of the Null Objects, in effect they keyframed each vertex, creating animation curves for each vertex of the Spline and resulting in precise control over every point.
“This wouldn’t have been possible if we had animated the Spline with Point Level Animation, or PLA, where the position, scale and rotation of every point an object is constructed from is recorded, every time a keyframe is created," Mike said. "To keyframe vertices in C4D, you generally have to use PLA, but we wouldn't have had the animation curves to create the smooth animation we wanted in the Cinema 4D Graph Editor.”
Dragon's Hair
To rig and animate the dragon's head, including the whiskers and every single strand of hair, all the parts were mapped onto separate polygons in Cinema 4D. The Jiggle Deformer was used to create secondary motion when the dragon's head was animated, and by painting vertex maps on each section, they could restrict the jiggle deformation to the tips of the hair and whiskers.
“Once we attached the head to the body, again using Xpresso, we found that the Deformer on the hair was affected by the position of the body - as the body of the Dragon moved quickly through the scene, travelling long distances, the hair was drastically pulled away from the dragon's head and became too distorted. This problem nearly had us stumped.
“We wanted the hair to only be affected by the rotation, but since the Jiggle Deformer couldn't be restricted to rotation, we solved this problem by placing the dragon's head into an Xref, then baked the cache of the Jiggle Deformer within the Xref for each shot. We were able to use rotation only on the keyframes required, then bake the Jiggle Deformer and reload it back into the scene. This way, it was no longer affected by the position.”
Whiskers
Rigging and animating the whiskers the same way they treated the body - with Spline Wraps and Nulls constrained to the vertices on each Spline - each whisker was hand animated. To straighten out each one, rather than use the Puppet tool in Photoshop, the artists redrew them individually in Illustrator, which kept the design much simpler.
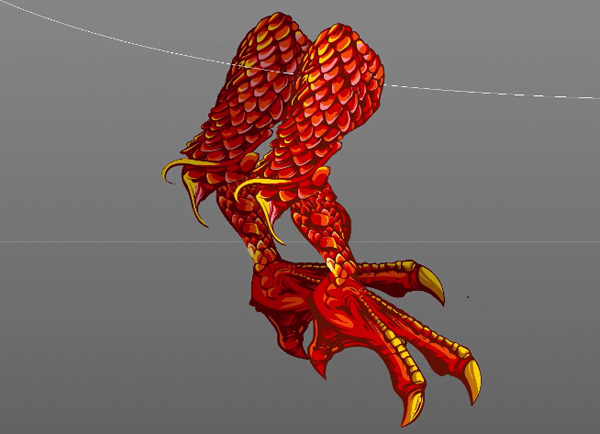
They also kept the claw rig quite simple, parenting the talons to the wrist, the wrist to the elbow and the elbow to the shoulder. Then some further Xpresso was used to attach the shoulder to the body, which was in a Spline Wrap as explained above. “Xpresso is an incredibly powerful tool in the Cinema 4D arsenal,” Mike commented. “It can be used for a lot more than rigging and animation. You can create almost any type of behaviour for objects, link behaviours to each other, and automate all kinds of interactions between objects in a scene.”
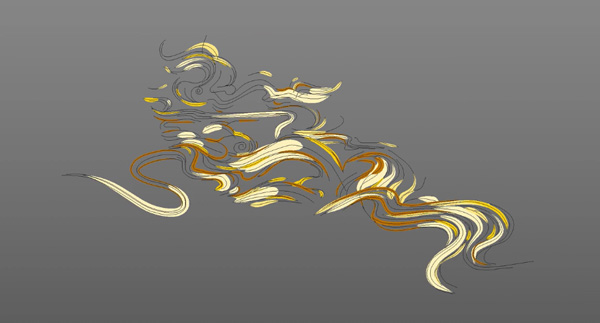

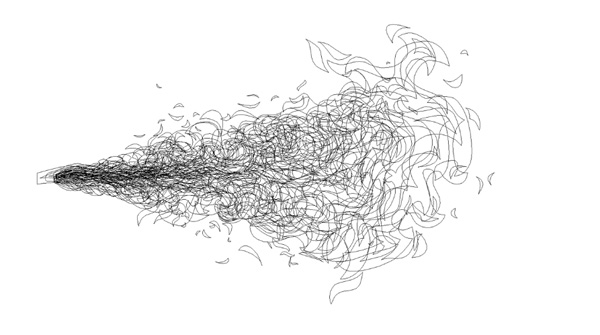
Lively Clouds
As well as taming the Dragon, the team needed a way to recreate the feeling of the wispy and billowy clouds in the 3D environment. “We wanted them to feel alive," said Mike. "To achieve a result we were happy with, each cloud was completely redrawn in Cinema 4D with a separate spline for each different coloured stroke, an extremely time consuming part of the process with some of the clouds consisting of up to almost 100 splines.
“To create each wisp, the paint strokes were mapped onto polygon strips using the alpha channel to cut out the shape. Each polygon strip was cloned to create multiple copies and then deformed and animated along each spline to create hundreds of individual brush strokes that continually re-draw themselves, on and off. A Displace Deformer was used with soft noise to create further undulation to the group of splines.”
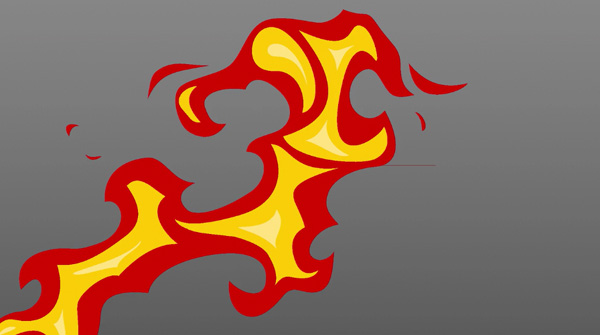
Fired Up

The look of the fire animation had to be created from scratch and, again, they wanted it to compliment the style of the illustration. Therefore, traditional frame-by-frame animation was the chosen approach - each frame was drawn separately by hand in Illustrator to create an image sequence with an alpha, and then all frames were exported, without the background, to create a sequence. After importing the sequence onto a plane in Cinema 4D, it was positioned to work with the camera for that particular shot.
“Due to the flat 2D look we were going for to match the style of the illustration, mostly working with imported graphics, we were able to render out each finished shot from Cinema 4D quite quickly and get very close to the look we wanted using the Standard Renderer. We also exported a Depth Pass with each shot and used the Frischluft Lenscare plugin for depth of field – that flexibility meant that, instead the usual compositing functions, we really only needed After Effects for the depth of field look and gradiated background,” said Mike
Here is a look at the whole process, cut together in a process reel:


